Dashboard Configuration
Important
Access Requirements: Only users with the 🔑DashboardWriteOwn or 🔑DashboardWritePublic permission can see and access the Dashboard Configuration menu item. These permissions allow you to add, edit, reorder, show, and hide private or public dashboards.
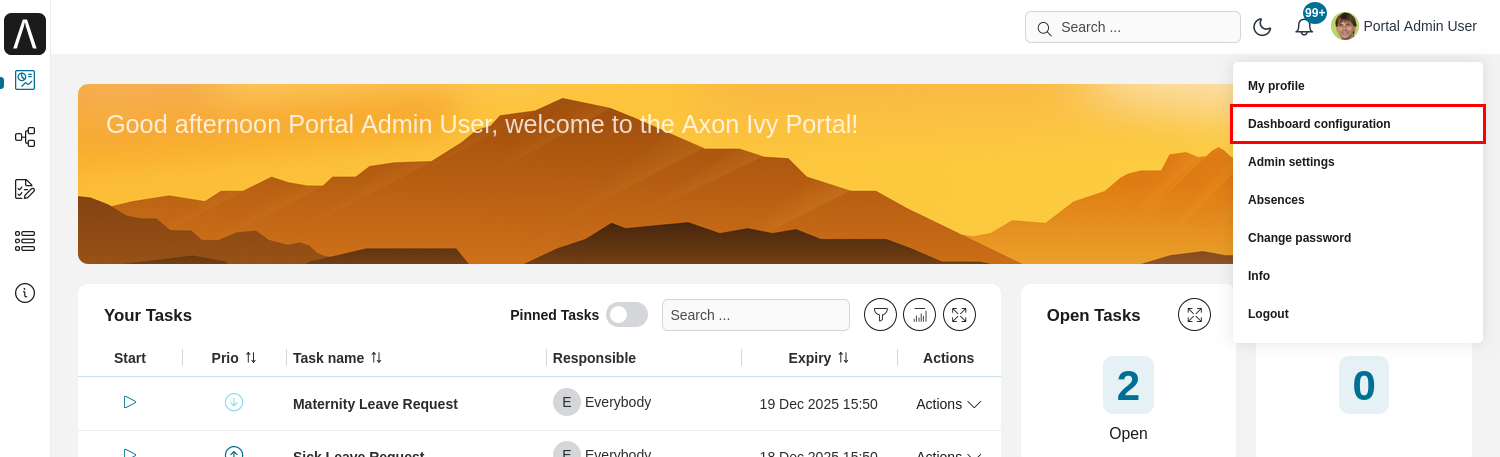
Dashboard Configuration provides centralized management of your personal and organization-wide dashboards. Access it through the Dashboard Configuration user menu item.
Overview
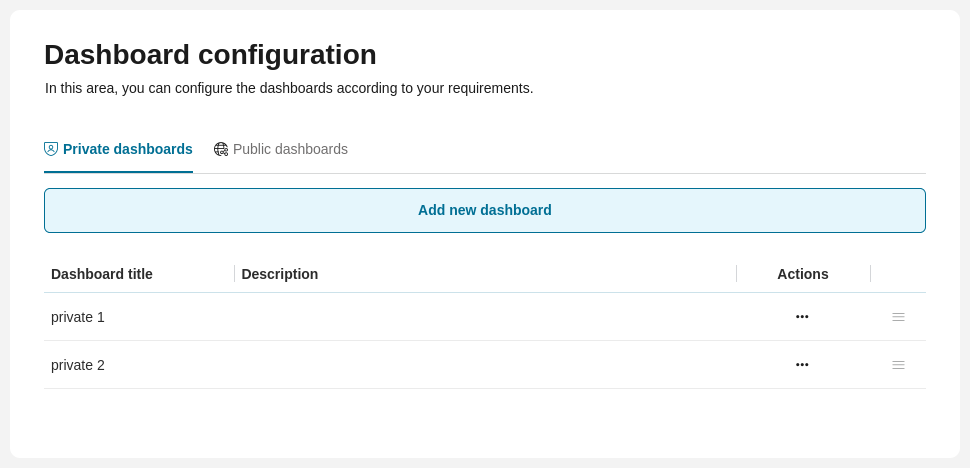
The Dashboard Configuration page has two tabs:
Tab |
Required Permission |
Purpose |
|---|---|---|
Private Dashboards |
Manage your personal dashboards visible only to you |
|
Public Dashboards |
Manage shared dashboards visible to users with specific permissions |
Private dashboards configuration
The tab Private dashboards allows you to add or edit your private dashboards, and reorder all dashboards visible to you.
HowTo: add private dashboard
Select Add New Dashboard button
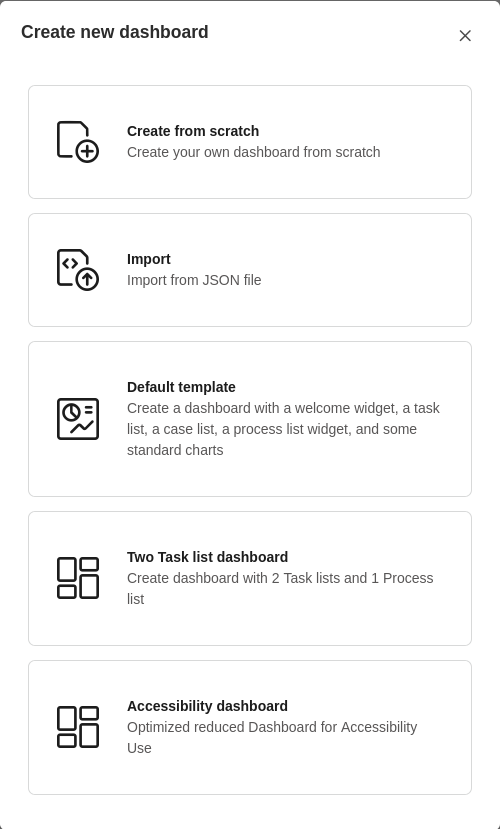
Select one of the available templates to add (see Available dashboard templates).
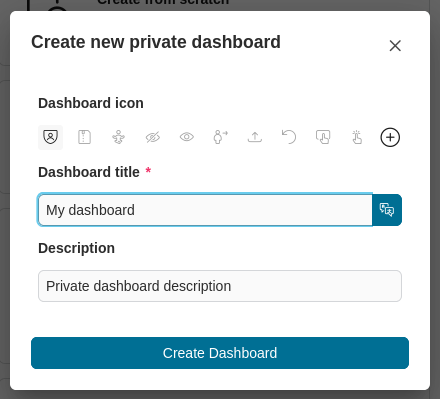
The Create new private dashboard dialog is opened.
Enter the mandatory title and the optional description for the private dashboard.
Create your private dashboard by selecting
 Create dashboard.
Configure your private dashboard (see: Dashboard).
Back on the dashboards list, you see that a new private dashboard has been added.
To set multi languages for the dashboard title, see at Portal Multi Language:
Available dashboard templates
Default Template, Two Task list dashboard template and Accessiblity dashboard template. Please see the image below for more details.
Hint
The list of private dashboards shows only the private dashboards that have been created by you.
HowTo: import private dashboards
Note
Requires 🔑DashboardImportOwn permission.
Select Add new Dashboard button.
Select
 Import.
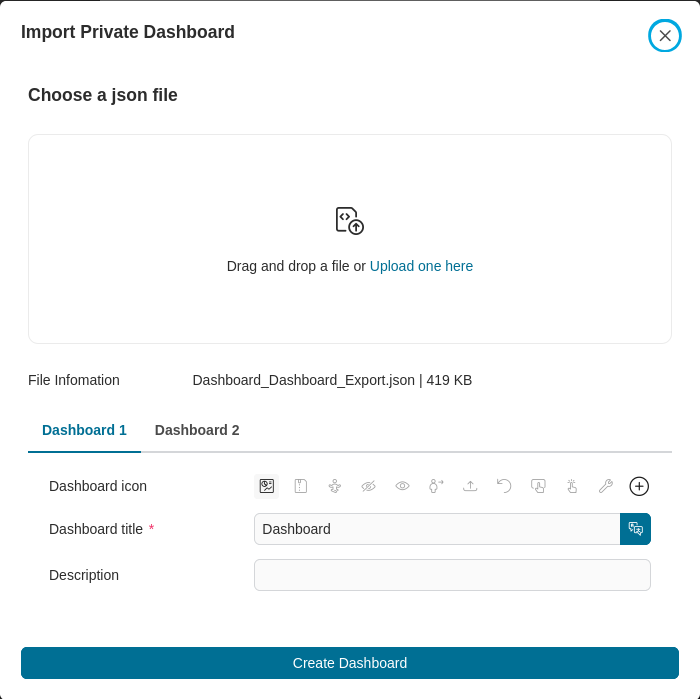
The Import Private Dashboard dialog is opened.
Drag and drop, or click on the Upload one here link to select the JSON file containing the dashboard you want to import.
Edit the mandatory title and the optional description for the private dashboard.
Import the dashboard by selecting Create Dashboard button.
Configuration your private dashboard (see: Dashboard).
Back on the dashboard list, you see that a new private dashboard has been added.
HowTo: edit private dashboards
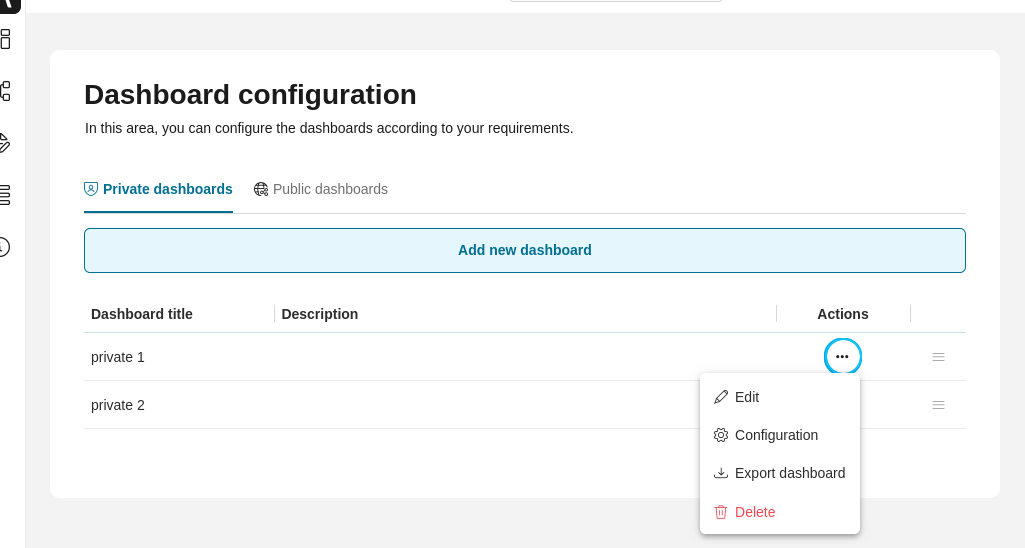
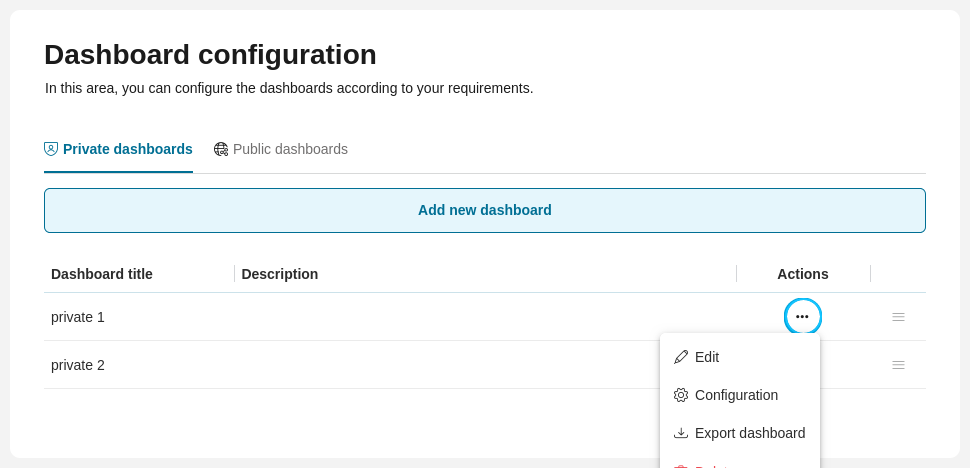
The Edit private dashboard section shows your private dashboards in a table with the following columns:
Dashboard title: The name of the dashboard
Dashboard description: Optional description text
Actions: Available operations for each dashboard
Available Actions:
Click on  to open the Actions menu with these options:
 Edit: Modify dashboard name and description
 Configuration: Configure dashboard widgets (see: Dashboards)
 Export: Download dashboard as JSON file (requires 🔑DashboardExportOwn permission)
 Delete: Remove the private dashboard
HowTo: reorder private dashboards
You can rearrange dashboards by dragging and dropping  icon.
icon.
Note
Once created, your personal sort order is retained.
Once you have created a personal sort order, you can rearrange the order, but you cannot delete your personal sort order.
Hint
If you create new dashboards, they are automatically added to the end of your personal sort order.
Public dashboards configuration
The tab Public dashboards allows you to add, edit, and reorder public dashboards.
HowTo: add public dashboard
Select Add New Dashboard button.
Select one of the available templates to add (see Available dashboard templates).
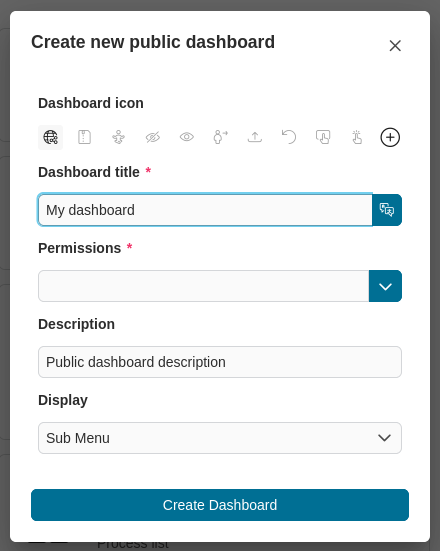
The Create new public dashboard dialog is opened.
Enter the mandatory title, permissions to see the public dashboard and the optional description for the public dashboard. If the Top Menu Item checkbox is checked, the dashboard appears as a top-level item in the navigation bar. If unchecked, it appears as a sub-item under Dashboard menu item.
Create the public dashboard by selecting
Create dashboard.Configuration public dashboard (see: Dashboard).
Go back to the dashboards list to see that a new public dashboard has been added.
To set multi languages for the dashboard title, see at Portal Multi Language:
Available dashboard templates
Default Template, Two Task list dashboard template and Accessiblity dashboard template.
Hint
Depending on dashboard roles, you might see other public dashboards in the dashboards list.
HowTo: import public dashboard
Note
Requires 🔑DashboardImportPublic permission.
Select Add New Dashboard button.
Select
Import.The Import Public Dashboard dialog is opened.
Drag and drop, or click on the Upload one here link to select the JSON file containing the dashboard you want to import.
Edit the mandatory title, permissions to see the public dashboard and the optional description for the public dashboard. If the Top Menu Item checkbox is checked, the dashboard appears as a top-level item in the navigation bar. If unchecked, it appears as a sub-item under Dashboard menu item.
Import the dashboard by selecting Create Dashboard button.
Configuration public dashboard (see: Dashboard).
Go back to the dashboard list to see that a new public dashboard has been added.

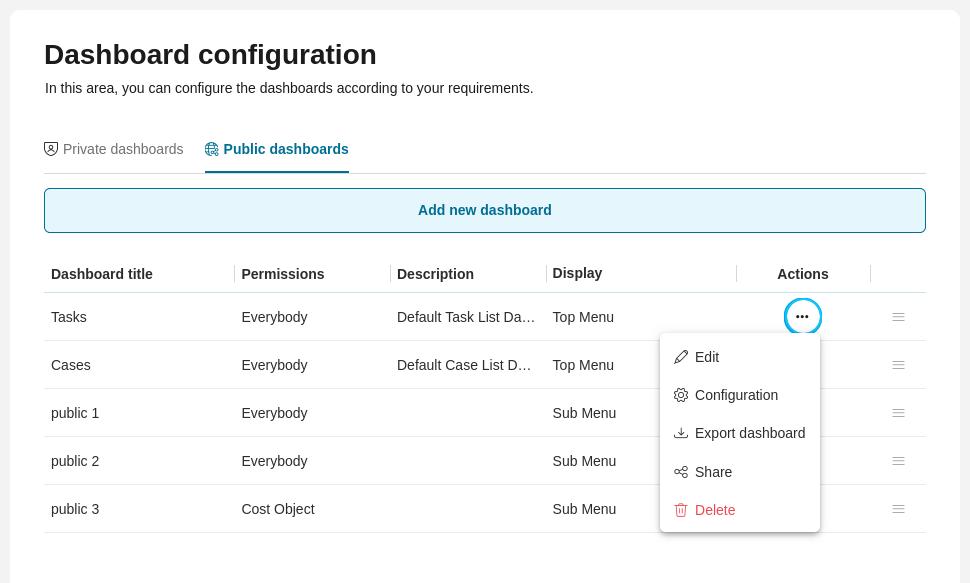
HowTo: edit public dashboards
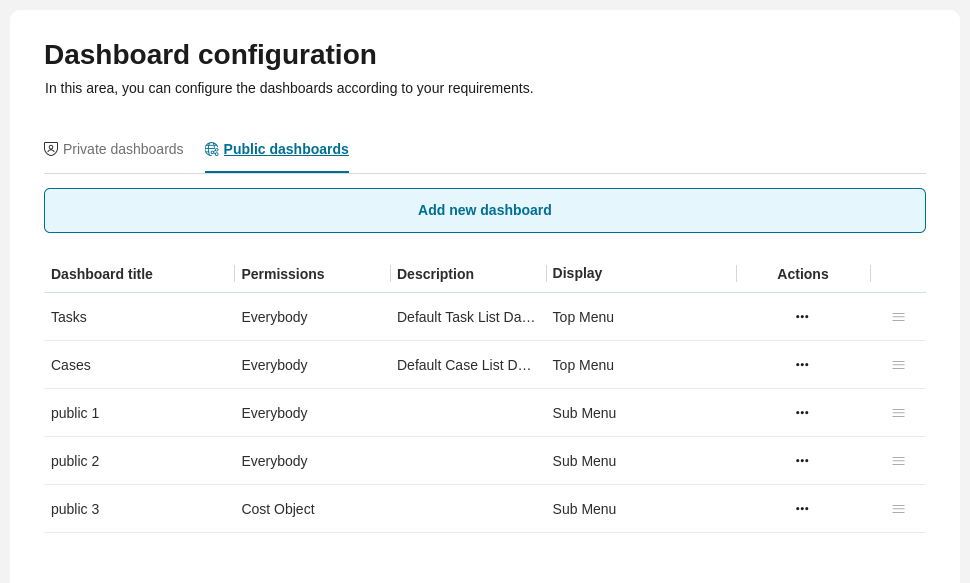
The Edit public dashboards section shows you the public dashboards in a table with the following columns:
Dashboard title: The name of the dashboard
Dashboard permissions: Roles/permissions that can access the dashboard
Dashboard description: Optional description text
Display as top menu or not: Whether it appears in the top navigation bar
Available Actions:
Click on to open the Actions menu with these options:
- Edit: Modify dashboard name, permissions, and description
- Configuration: Configure dashboard widgets (see: Dashboards)
- Export: Download dashboard as JSON file (requires 🔑DashboardExportPublic permission)
 Share: Generate a shareable link to the dashboard (requires 🔑ShareDashboardLink permission)
- Delete: Remove the public dashboard
HowTo: share public dashboards
Note
Requires 🔑ShareDashboardLink permission.
To generate a public dashboard link, simply click on the Share in the Actions menu of the dashboard.

Tip
To share the dashboard without the menu frame, add the parameter openWithoutMenu=true to the URL. However, please be aware that this option is only for embedding purposes.
HowTo: reorder public dashboards
You can rearrange dashboards by dragging and dropping icon.

Permission Reference
Different dashboard actions require specific permissions:
Action |
Required Permission |
|---|---|
Import private dashboard |
|
Export private dashboard |
|
Import public dashboard |
|
Export public dashboard |
|
Share public dashboard link |