Legacy Dashboard
The Axon Ivy Portal Dashboard is the first page you see after having logged in. You can always get back to the dashboard using the Dashboard link in the Axon Ivy Portal menu. Alternatively, you can click on the logo in the header.
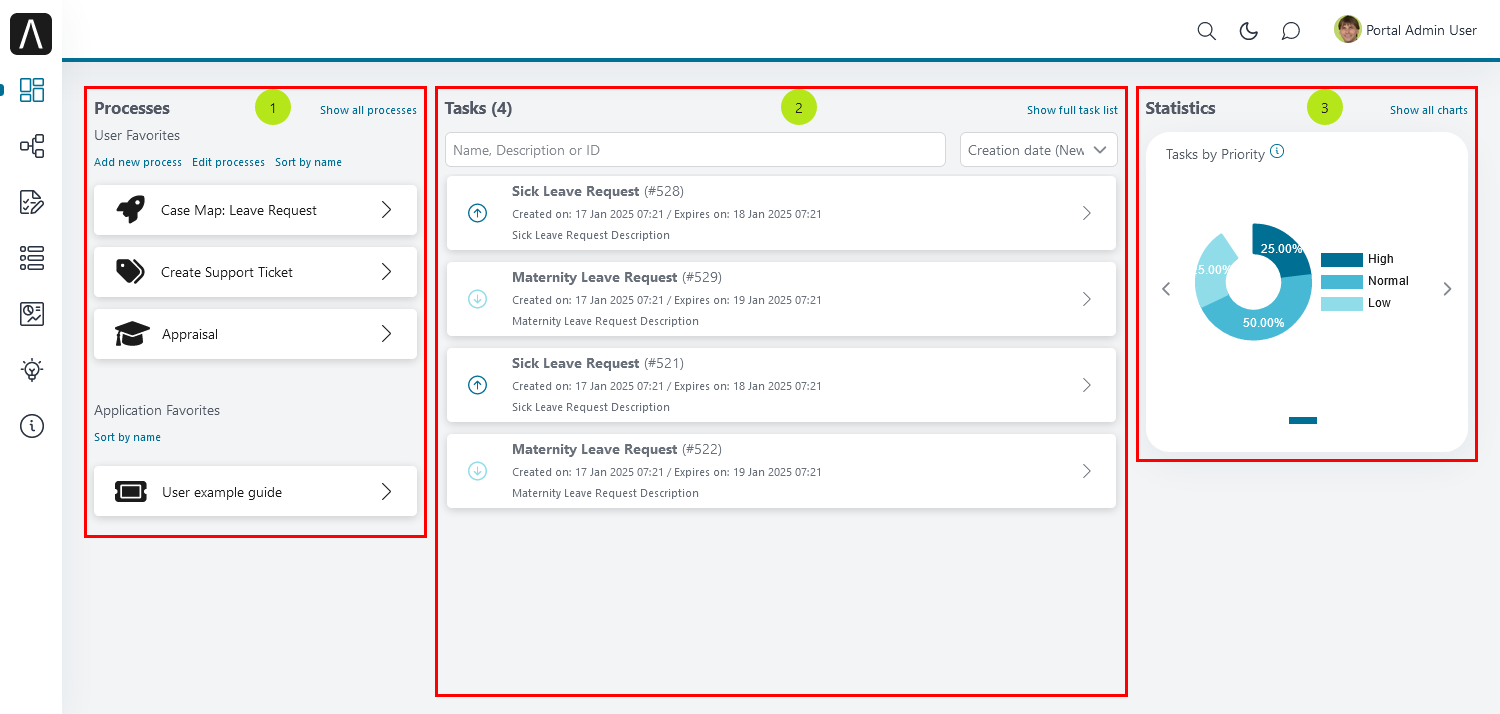
The dashboard itself is divided into three sections:
At the left, manage quick links to the processes you use most often in your daily work. The section Processes is described in Process Favorites.
In the center, you see the Tasks section. Here you see all the open tasks assigned to you, your organizational unit or your roles. These tasks require your attention. The section is described in Personal Tasks.
On the right, you see the Statistics section. Its charts provide you with basic information on the performance of your cases and tasks. This section is described in Statistics.
Process Favorites
The Process favorites you find in Processes at the left. They allow you to quickly access the processes you need most often in your daily work. To make full use of this feature, the Axon Ivy Portal offers you an easy way to configure the process favorites to your personal needs.
Note
Grant permission 🔑AccessFullProcessList to allow a user to access the full process list.
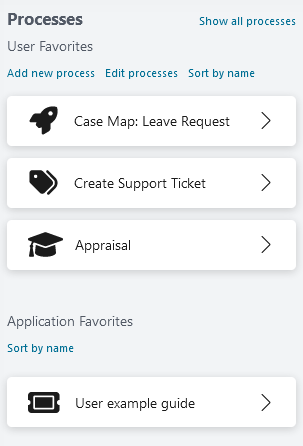
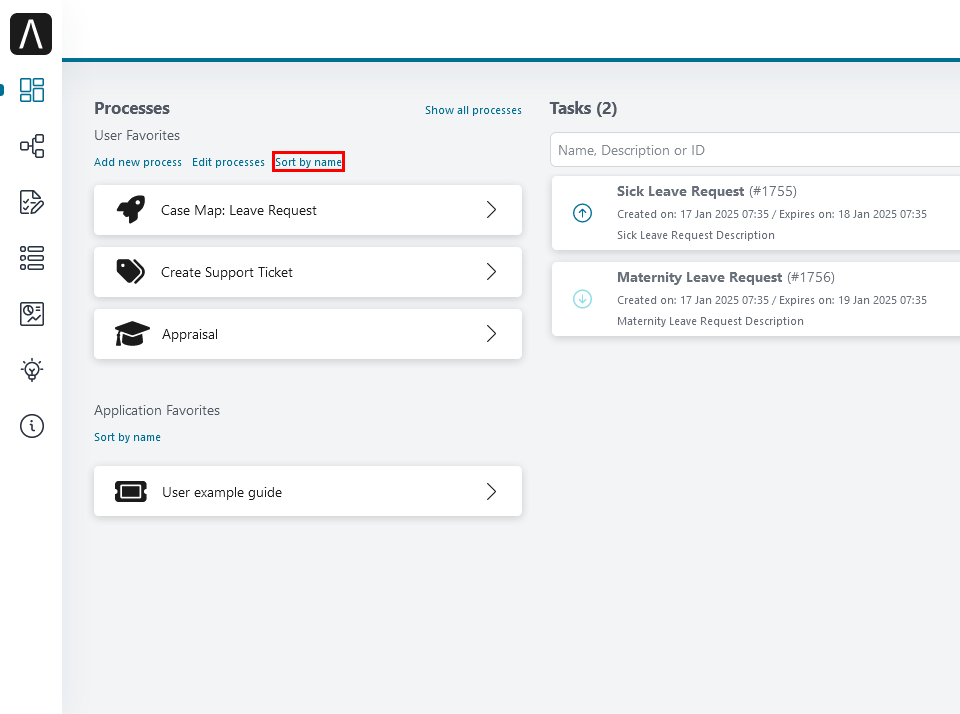
The process favorites are divided into two areas:
At the top, you find the User Favorites which you need to configure before you can use them. You may add here processes and external links.
Below the User Favourites, you find the Application Favorites. They are configured by your administrator. Therefore, you may use but not change them.
To the right of the Processes header, you see a link Show all processes.
This quick link routes you to the Full Process List page of the Axon Ivy
Portal. Please refer to Full Process List for detailed information.
If there is a red warning icon on the right side of a process, it indicates that this process has changed its status and thus, the does no longer work.

In this case, you can delete it by following HowTo: Delete a process as a user favorite and add the correct process link by following HowTo: Add a process as a user favorite.
HowTo: Add a Process as a User Favorite
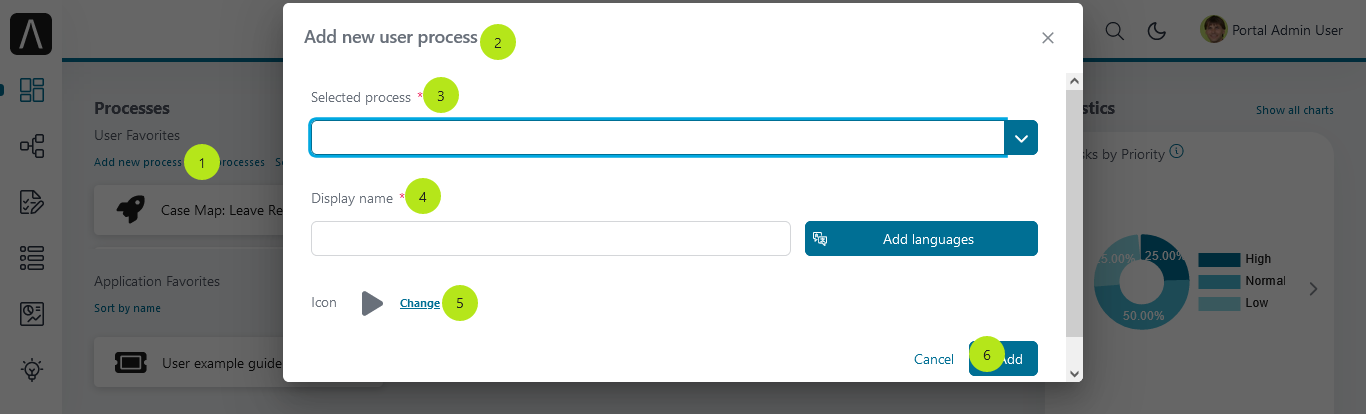
Click on the link
Add new processwhich you find next to the heading User Favorites.The dialog Add new user process opens.
Use the dropdown menu
Selected processto select the process you want to add.The
Display namecontains the default process name. To add multilingual names for your favorite processes, click Add languages.To change the icon of the process, click

Changeand select your preferred icon from the list.Confirm your configuration by clicking Add.
Hint
The list of processes in the dropdown menu shows only the processes which are accessible to you. This depends on your roles.
The list shows only processes not already added to your user favorites. You cannot add a process multiple times.
HowTo: Delete a Process from User Favorites
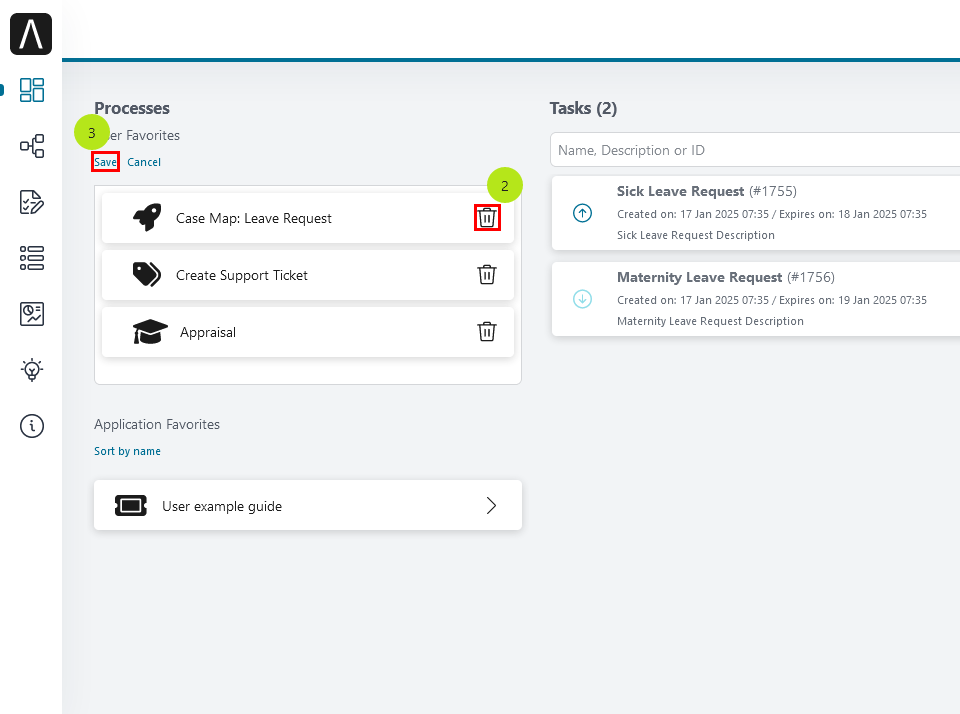
Click on the
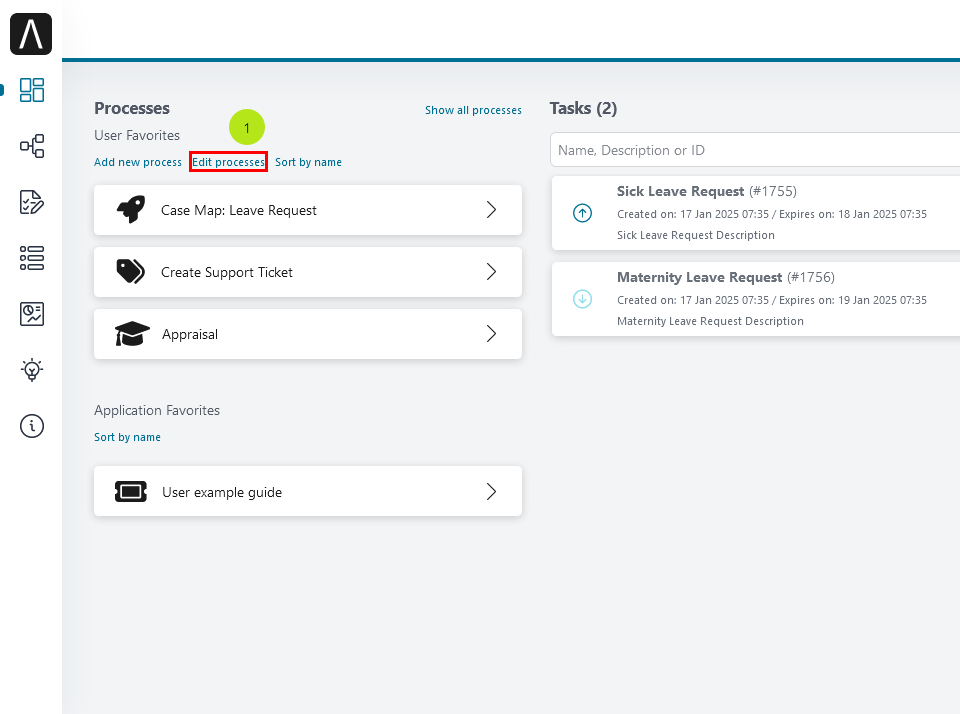
Edit processesnext to the heading User Favorites.Click on the
 Delete symbol next to process / processes
you wish to remove from your user favorites.
Delete symbol next to process / processes
you wish to remove from your user favorites.Confirm the removal by clicking
Savebelow User Favorites.
HowTo: Reorder User Favorites
There are two ways to order the processes in your User Favorites.
Sort by Name
To order your processes and external links in an alphabetical order
you can use the link Sort by name next to the heading User Favorites.
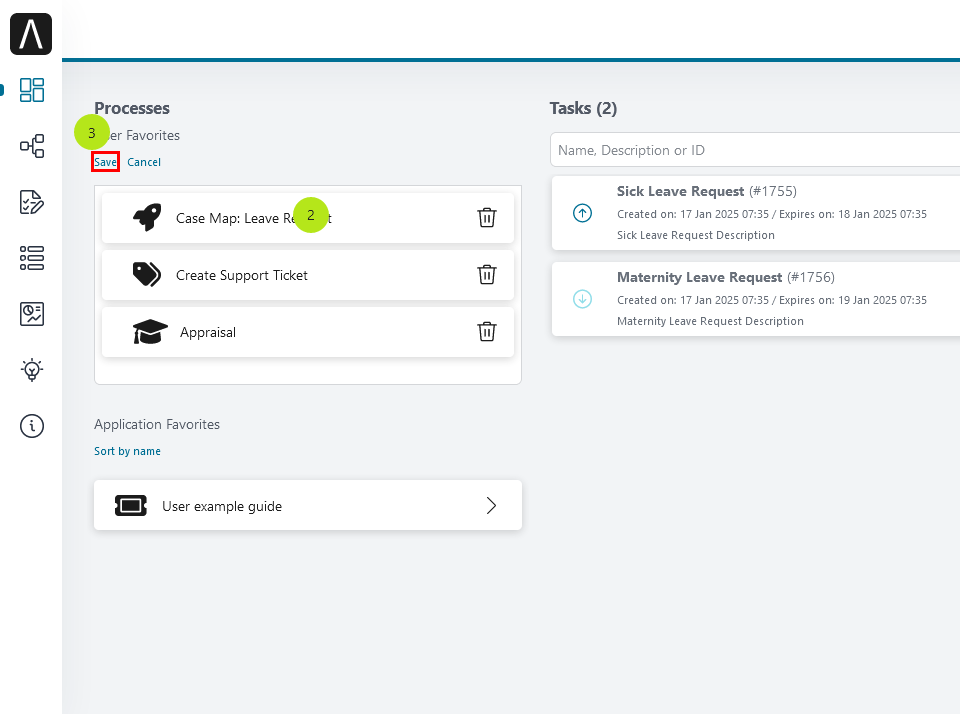
Edit Processes
To order your processes in an individual order, click on the link
Edit processesnext to the heading User Favorites.To change the order of your processes, drag and drop processes.
Confirm the current order by clicking
Savebelow User Favorites.
Personal Tasks
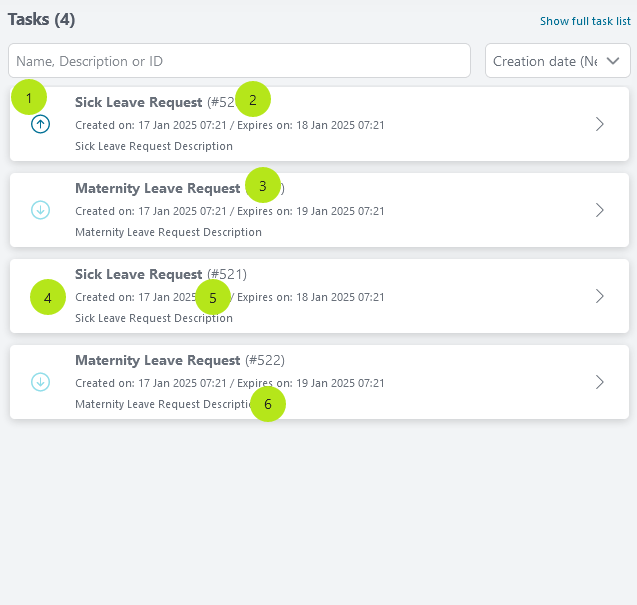
You find personal tasks under the heading Tasks in the center of your dashboard. You see here all tasks that are assigned to you or any of the roles you hold within the application. Therefore, this section is key in understanding your workload within the application. You may pick any task from the task list and start working on it.

You see the number of tasks right next to the heading Tasks. At the
right, you find the link Show full task list. This quick link
routes you to the Task List page of the Axon Ivy Portal. Please refer to
Full Task List for detailed information. Grant permission 🔑AccessFullTaskList to allow a user to access the full task list.
Right below the heading Task, you find the following features which help you find the correct tasks:
The Axon Ivy Portal searches for your keyword in the task ID, name and description of the tasks in your task list.
On the right side of the Tasks section, you can select the desired sort criteria (Creation Date Expiry Priority).
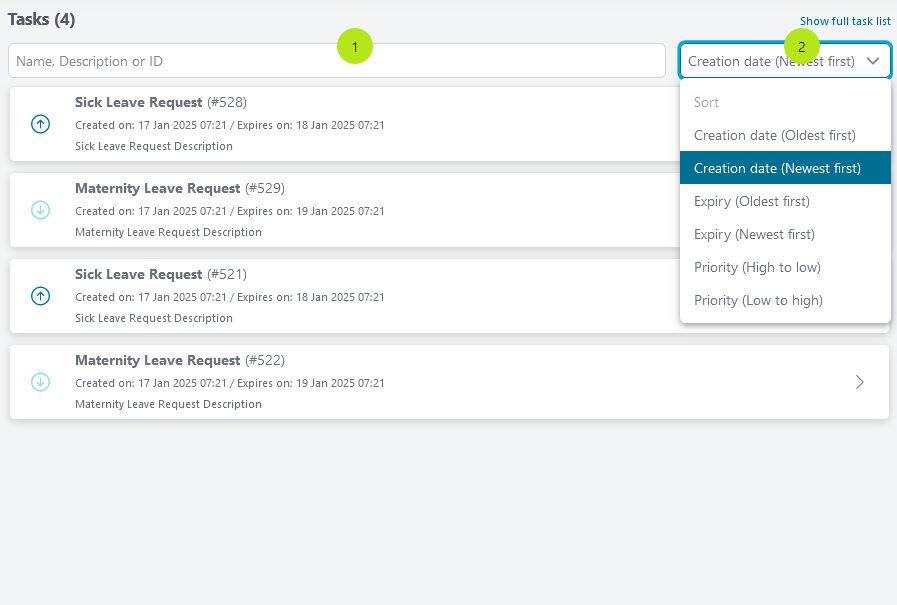
Each task in your task list has its own entry. The entry provides you with key information about the task. The following information can be found in the task entries:
The Task Priority
The Task Name
The Task ID
The Creation Date
The Expiry Date which is the due date until when the task should be completed.
The Task Description
Statistics
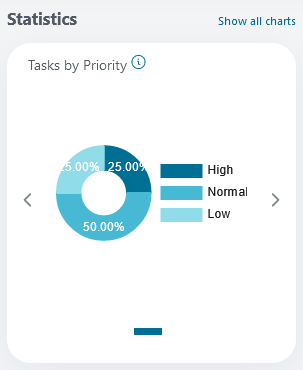
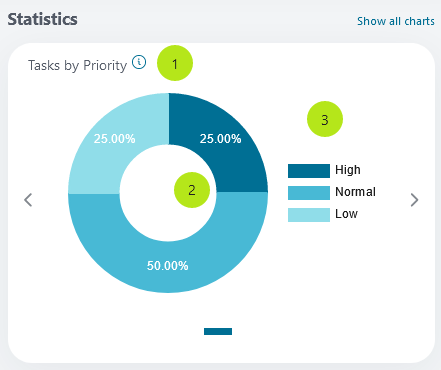
The statistics you find under the heading Statistics on the right-hand side of your dashboard. The charts in this section allow you to grasp the overall situation at a glance.
Next to the heading you find a link Show all charts. This quick link
routes you the Statistics page of the Axon Ivy Portal. Please refer
to Full Statistics Page for detailed information. Grant permission 🔑AccessFullStatisticsList to allow a user to access the full list of statistics.
Within header of the chart, you find two navigation buttons (![]() ,
,
![]() ) allowing you to toggle between the available charts. Each chart
provides you with the following information:
) allowing you to toggle between the available charts. Each chart
provides you with the following information:
The Chart Title describing the content of the chart
The Chart itself, which gives you a graphical representation of the data. You see the exact figures in the chart as well.
The Legend explains the different elements of the chart.
If you require more or different charts, you need to create them first. Chapter HowTo: Create chart explains in detail how to create new charts.