Axon Ivy Express
So far, this document familiarized you with the Axon Ivy Portal and explained how you can use processes provided to you by your IT department. The following chapter takes you to the next level.
Axon Ivy Express is a module of the Axon Ivy Portal. It enables you – as a business user – to create your own process applications and share them with your colleagues. These capabilities are also known as No-Code Application Platforms or Citizen Developer Platforms. Therefore, it is the perfect tool for you to digitize your processes and create standardization, reliability and traceability. Some of the key features of Axon Ivy Express are:
It is a No Coding Toolset, allowing business users without an IT background to create processes.
The Axon Ivy Portal Integration, allows business users to implement processes without IT department involvement.
The Seamless Integration into Axon Ivy allows you to make use of standard features like email notifications, task delegation, etc.
The Powerful Toolset allows you to create processes, define different task types, set responsibilities and due dates and define user dialogs for each task.
You can reach Axon Ivy Express by using the link Processes
in the Axon Ivy Portal menu.
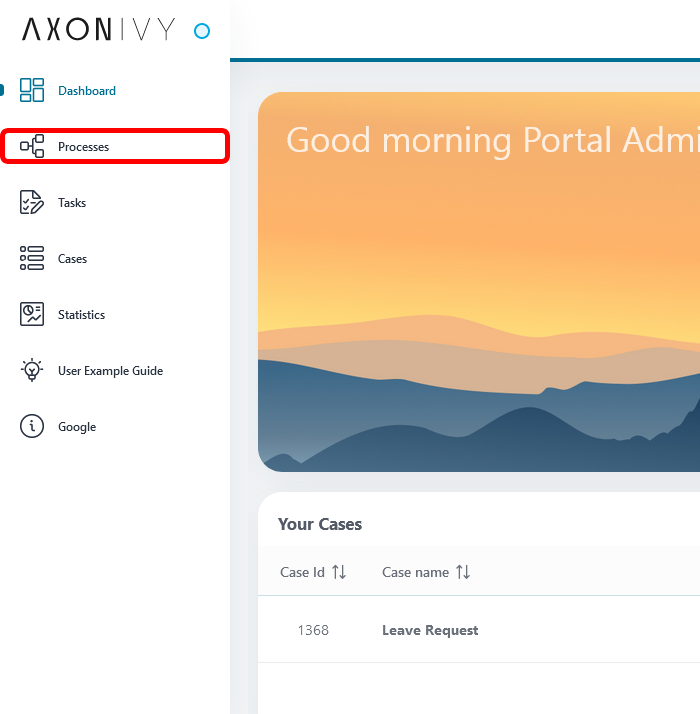
Below the heading Processes, you see the link Create Express Workflow.
Below, you find the process category Express Workflows with a list of
predefined processes.
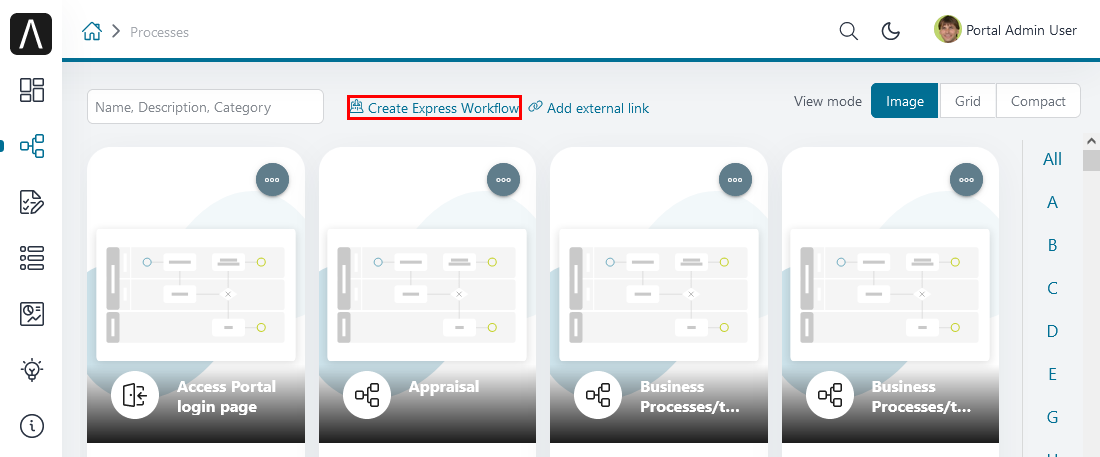
HowTo: Create an Express Workflow
Click on
Create Express Workflow.The Express Workflow editor is opened.
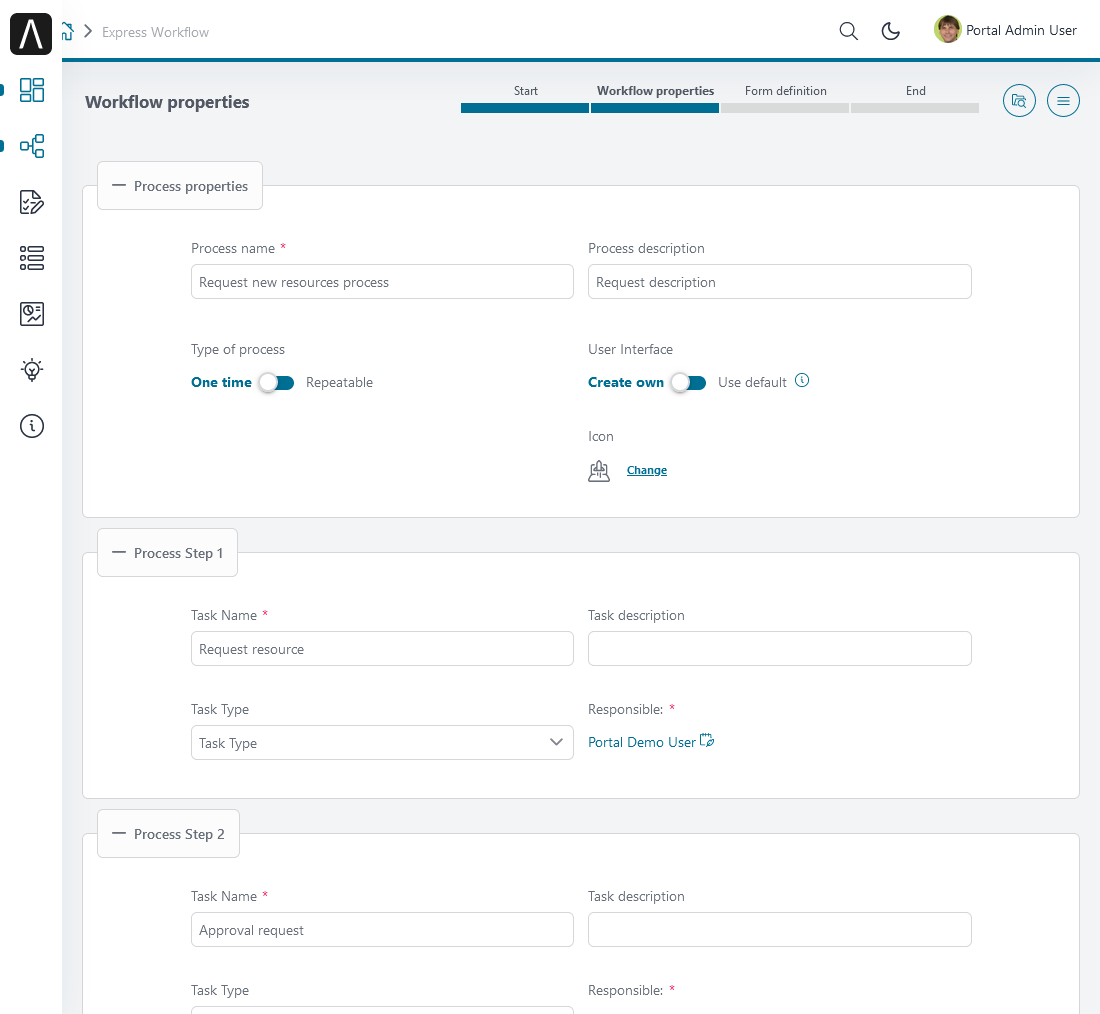
Define the Type of process:
Use the option One time if you want to execute the process only once.
Use the option Repeatable if you want to save the process for repetitive use. The process will automatically be deployed and added to the Full Process List page.
Define your User Interface :
With the option Create own you can create your own user dialog for each process step
With the option Use default, the user dialogs will automatically be generated by Axon Ivy Express
Provide a descriptive name under Process name
You may add a description under Process description. We strongly encourage you to use the description to provide details about your process.
Click on the link
Changebesides Icon to select the icon best suited for your process.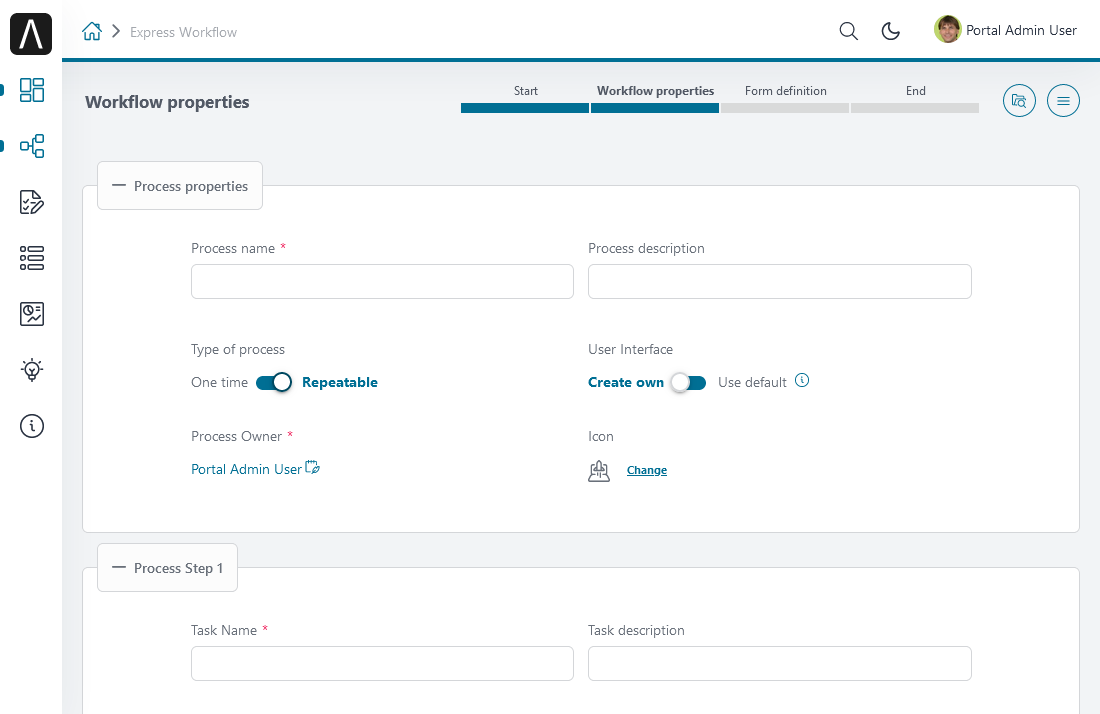
The first process step is already available for configuration.
You may add further process steps using the button Add process step
You may delete unnecessary process steps using the button Remove process step
For each process step,
select the Task Type (see Express Workflow task types).
provide a descriptive name in Task Name
provide an optional description in Task description.
For One time process type, the first process step defines the users or roles under Able to start who can start the process
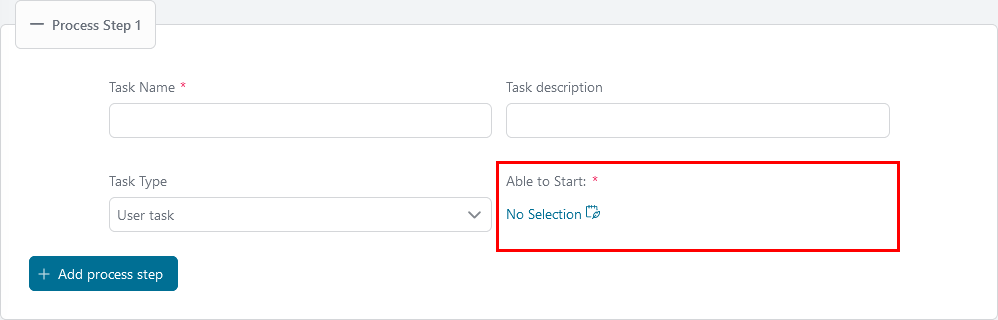
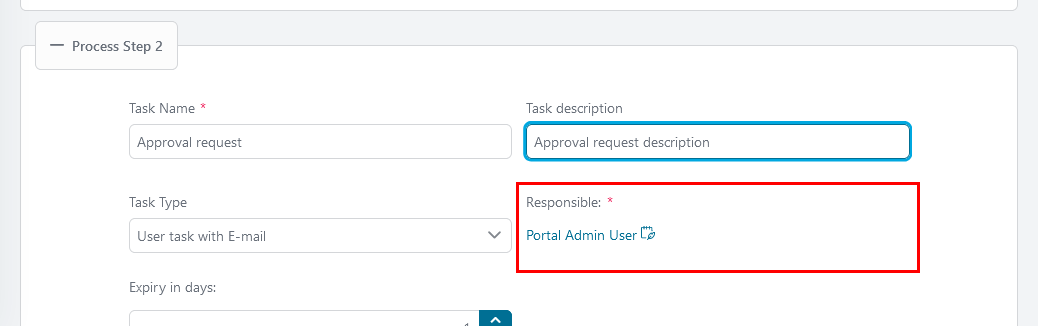
For all other process steps define the user or roles who are responsible to execute the task in Responsible .
For each process step except the first define the time before the task expires in Expiry in days
End the configuration of each process step by pressing Next
Express Workflow task types
Task type
Description
User Task
For this task the user can define a UI
User Task with Email
In addition to the normal User Task, the user can send an Email directly from the Axon Ivy Portal, without the need to change to another system
Information Email
This email can be defined by the creator of the Express Workflow and will be sent automatically without user action
Approval
This task type creates a approval task
Depending on the task type of the first process step, a different editor is opened. For both user task and task with email, the dialog editor is opened.
For each data item you need in your process, select an input element
Provide a descriptive name for the input in Label
Select the input type in Input type
Select if the input of this data item is required or not
Use the button
 Create to create the input element
The created element appears in the list Available form elements
To delete input elements you don’t need, klick its
 button.
Drag and Drop the input elements into one of the areas of the dialog editor
To remove an input element from the dialog, use the
Delete buttonTo preview your dialog, press the
 Preview button
To define an additional process step, klick the button
 Next
Next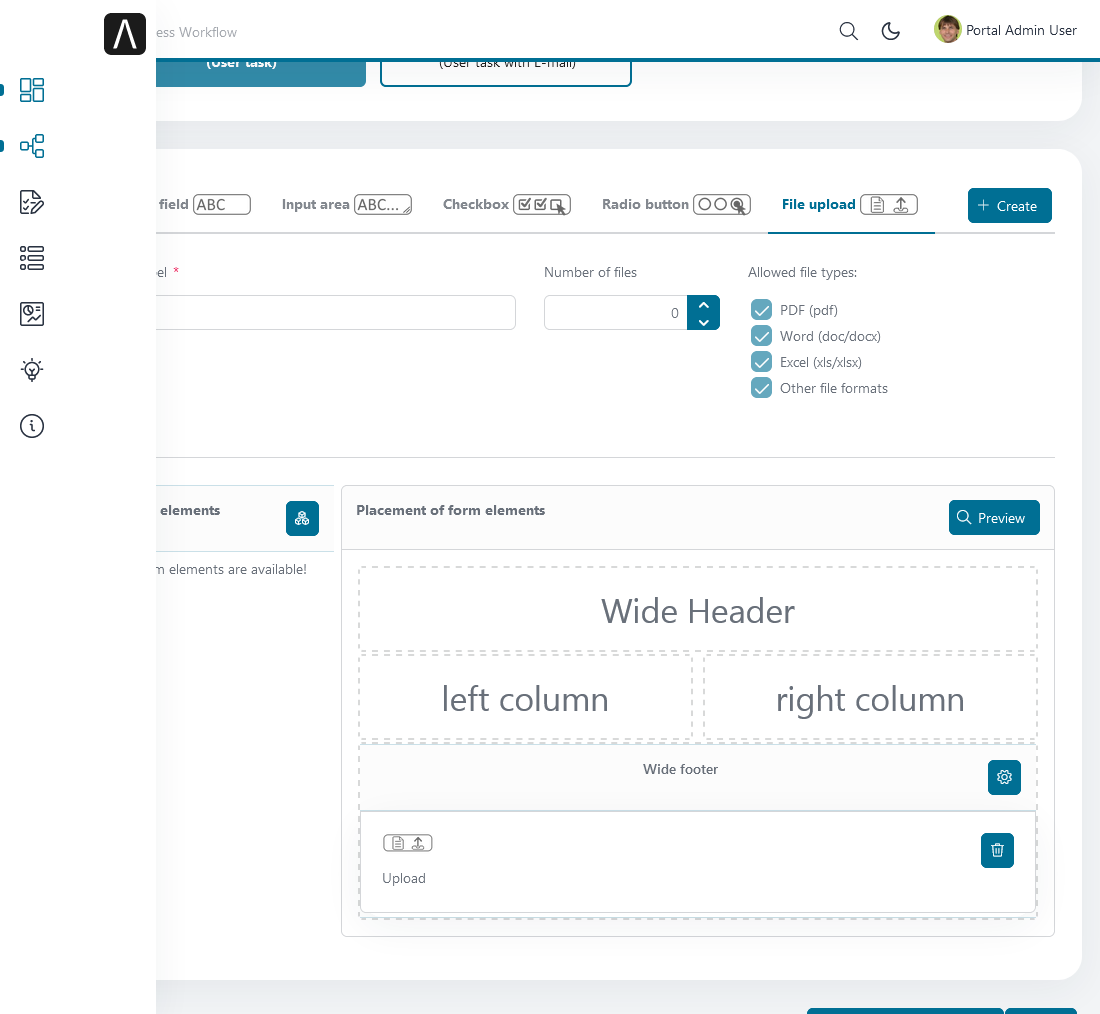
Hint
The results of all previous tasks are included in follow-on tasks in a read-only view, so that the user sees the whole history.
Express Workflow input elements
Input element
Description and options
Input field
Input field for text, numbers or dates
Text field
Number field
Date picker
Input area
Text input field between 1 and 10 rows
Checkbox
List of elements which allows the user a multiple selection
Radio button
List of elements which allows the user a single selection
File Upload
Provides a file upload dialog to the user. You may define:
Allowed file types
Number of allowed attachments
For process steps with the task type user task with email / information email, the email editor is opened.
Specify the addresses of the email recipients. Separate them by commas.
The response email email address is optional.
Specify the subject of the email.
Specify the email text.
Optionally, include attachments.
Use the button
Next to define the next process step
Note
Grant permission 🔑ExpressCreateWorkflow to enable creation of an Express Workflow.
Define an Information Email
For the information email, you see an email client UI where you can add information related to the process. You need to define a comma-separated list of addresses. Optionally, you can define a “response to” address.

Express Business Summary
After you have completed an Express workflow, you can check its summary data by accessing its Business Details page.
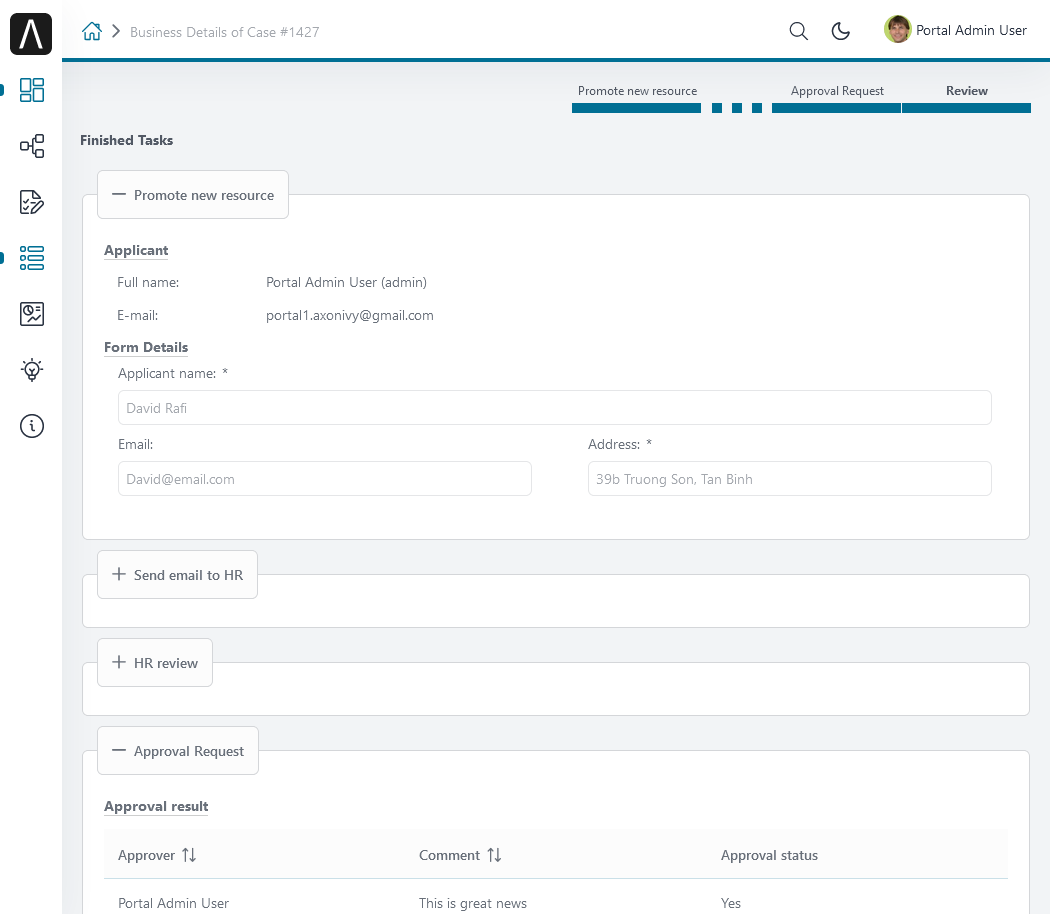
HowTo: Show Business Summary
Go to the Case List page and open the link
Actions,Business details.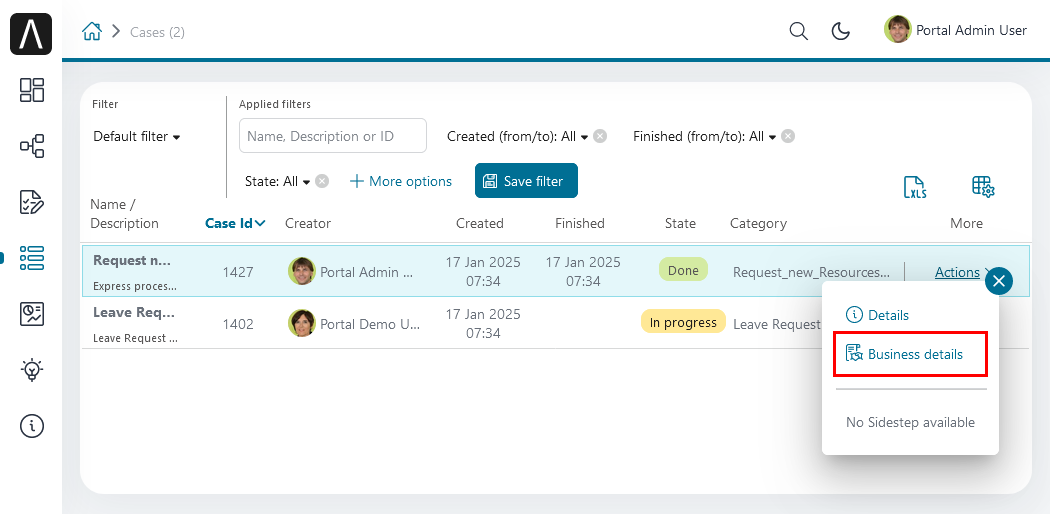
Then the
Express formis shown in read-only mode.
Note
If your process is running, you will only see the data of the current Express task on the Summary page
Axon Express Management
With Axon Express Management, an administrator can import/export Express workflows in JSON format. You find this feature in the Admin Settings <settings-admin-settings>.
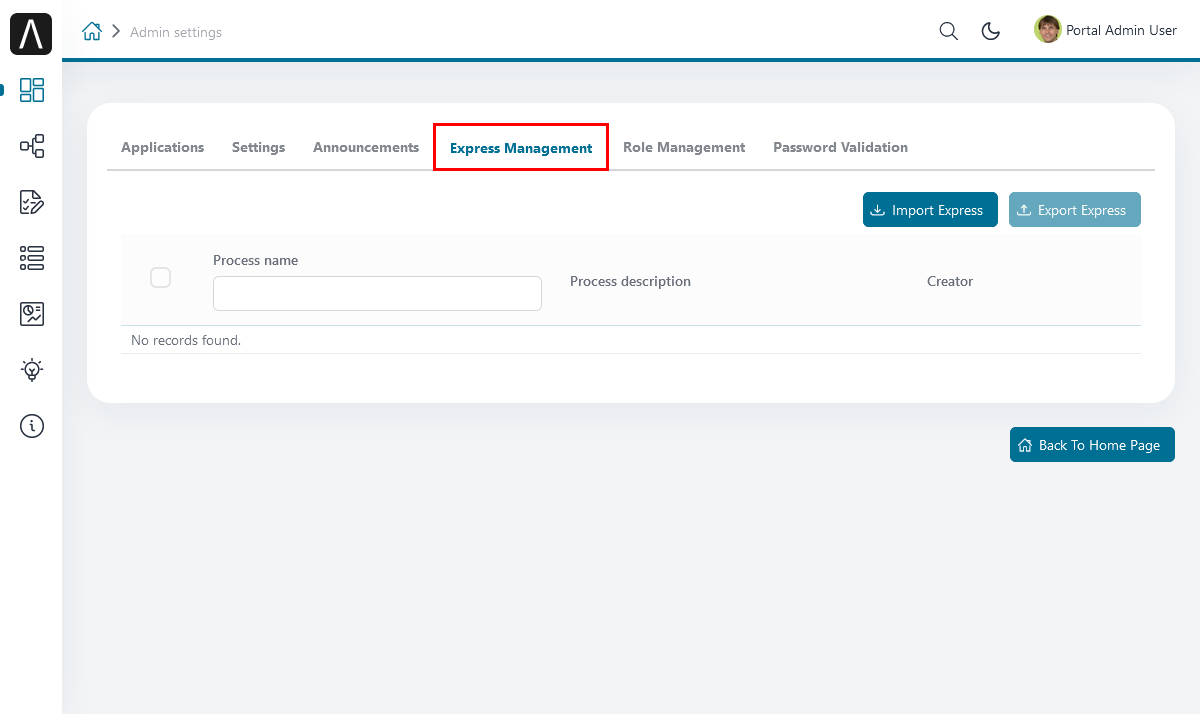
Note
To access this feature, you need to be granted the role AXONIVY_PORTAL_ADMIN.
HowTo: Export an Express Process
Select the workflows you want to export in Express workflows table. The selected workflows will be exported to a JSON file.
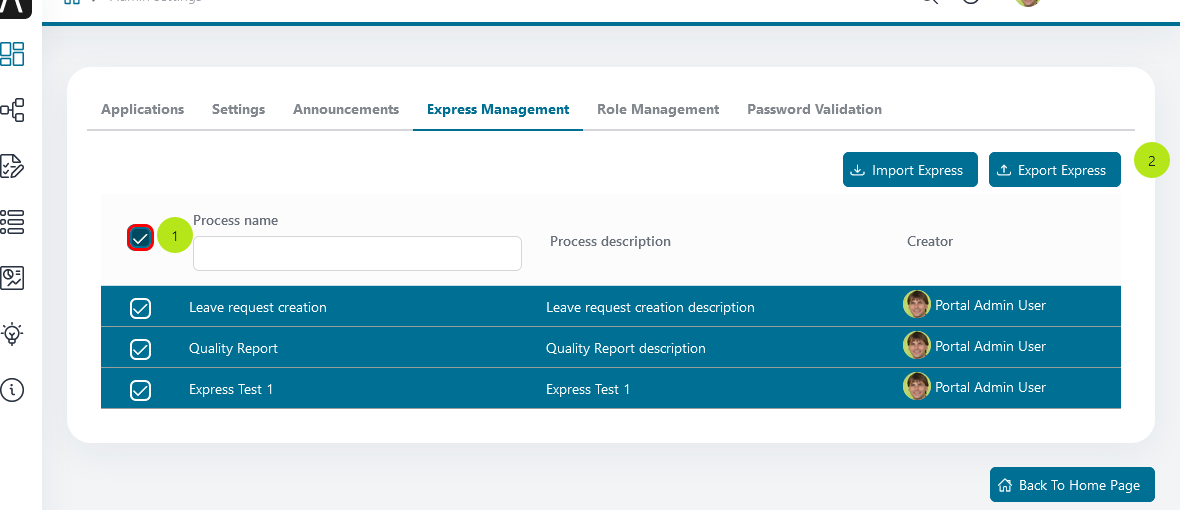
You can select multiple workflows by clicking the checkbox ALL.
After you selected some workflows, click the Export Express button.
The Export dialog will display and show the workflows selected for export.
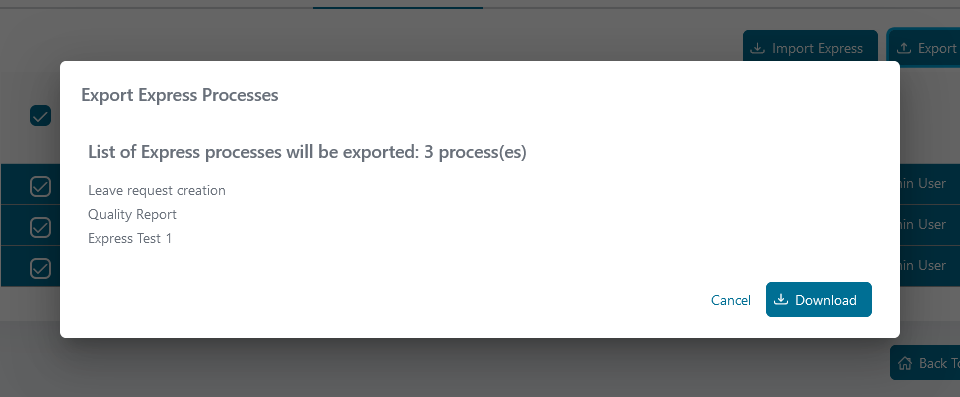
Review your selection, then press the Download button to download the selected workflows.
Important
The export file is a JSON file. It contains a version of Axon Ivy Express and Express process data. Don’t edit this file manually.
HowTo: Import an Express Process
The Import Express Process function allows the Administrator to import Express processes into the Portal from a backup file.
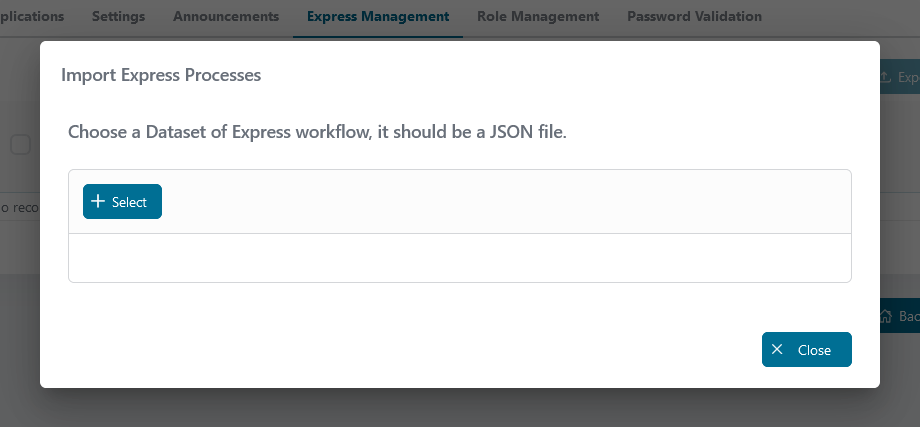
Press the Import Express button, Import Express dialog will display. Once the Import Express dialog is open, press the Select button and choose the Express JSON file that contains the workflows you want to import.
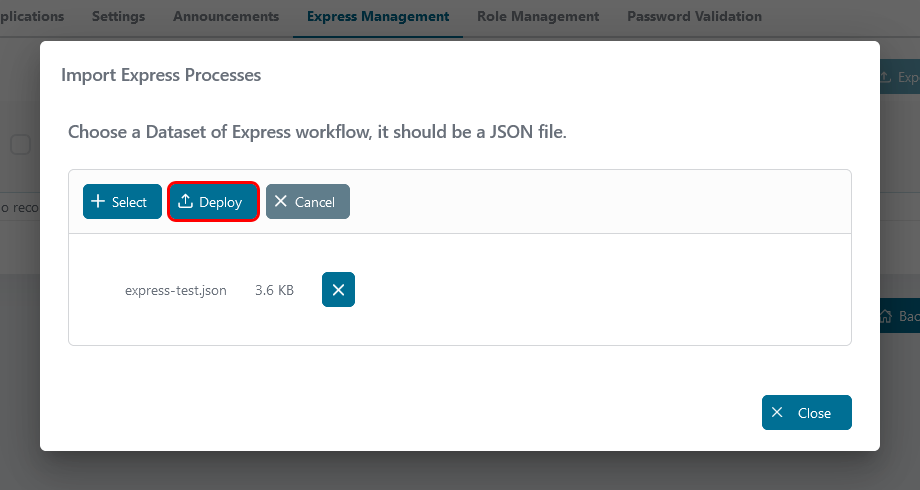
Then, press the Deploy button and wait for the deployment process.
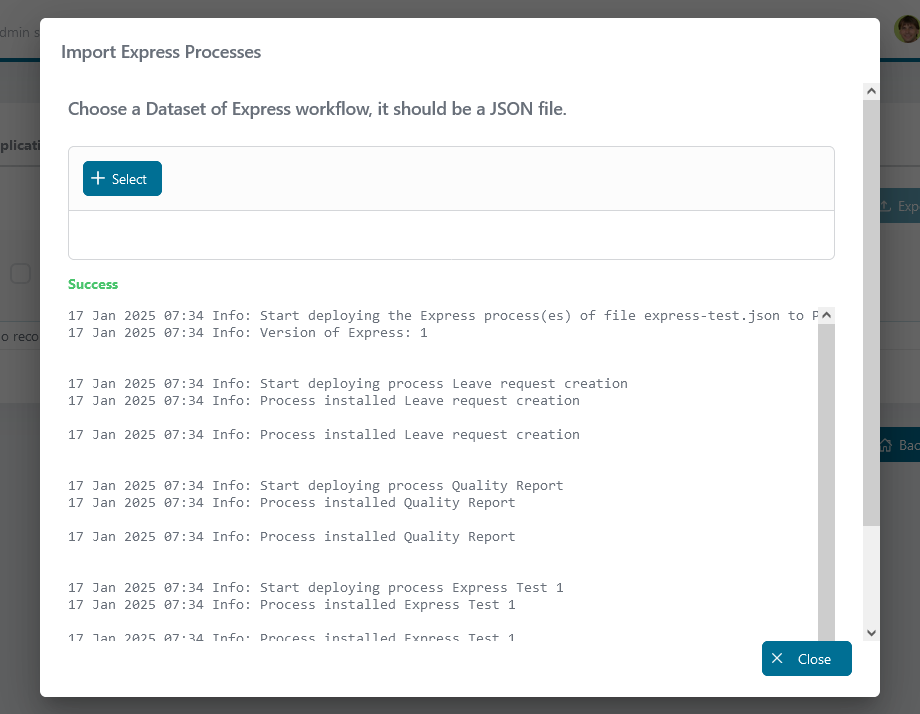
After the deployment process is completed, an output log panel will be displayed. You can see all the information collected during the deployment process.
Now, if the deployment process is successful, your workflows are imported and an administrator can check and/or edit them before they are ready to use.
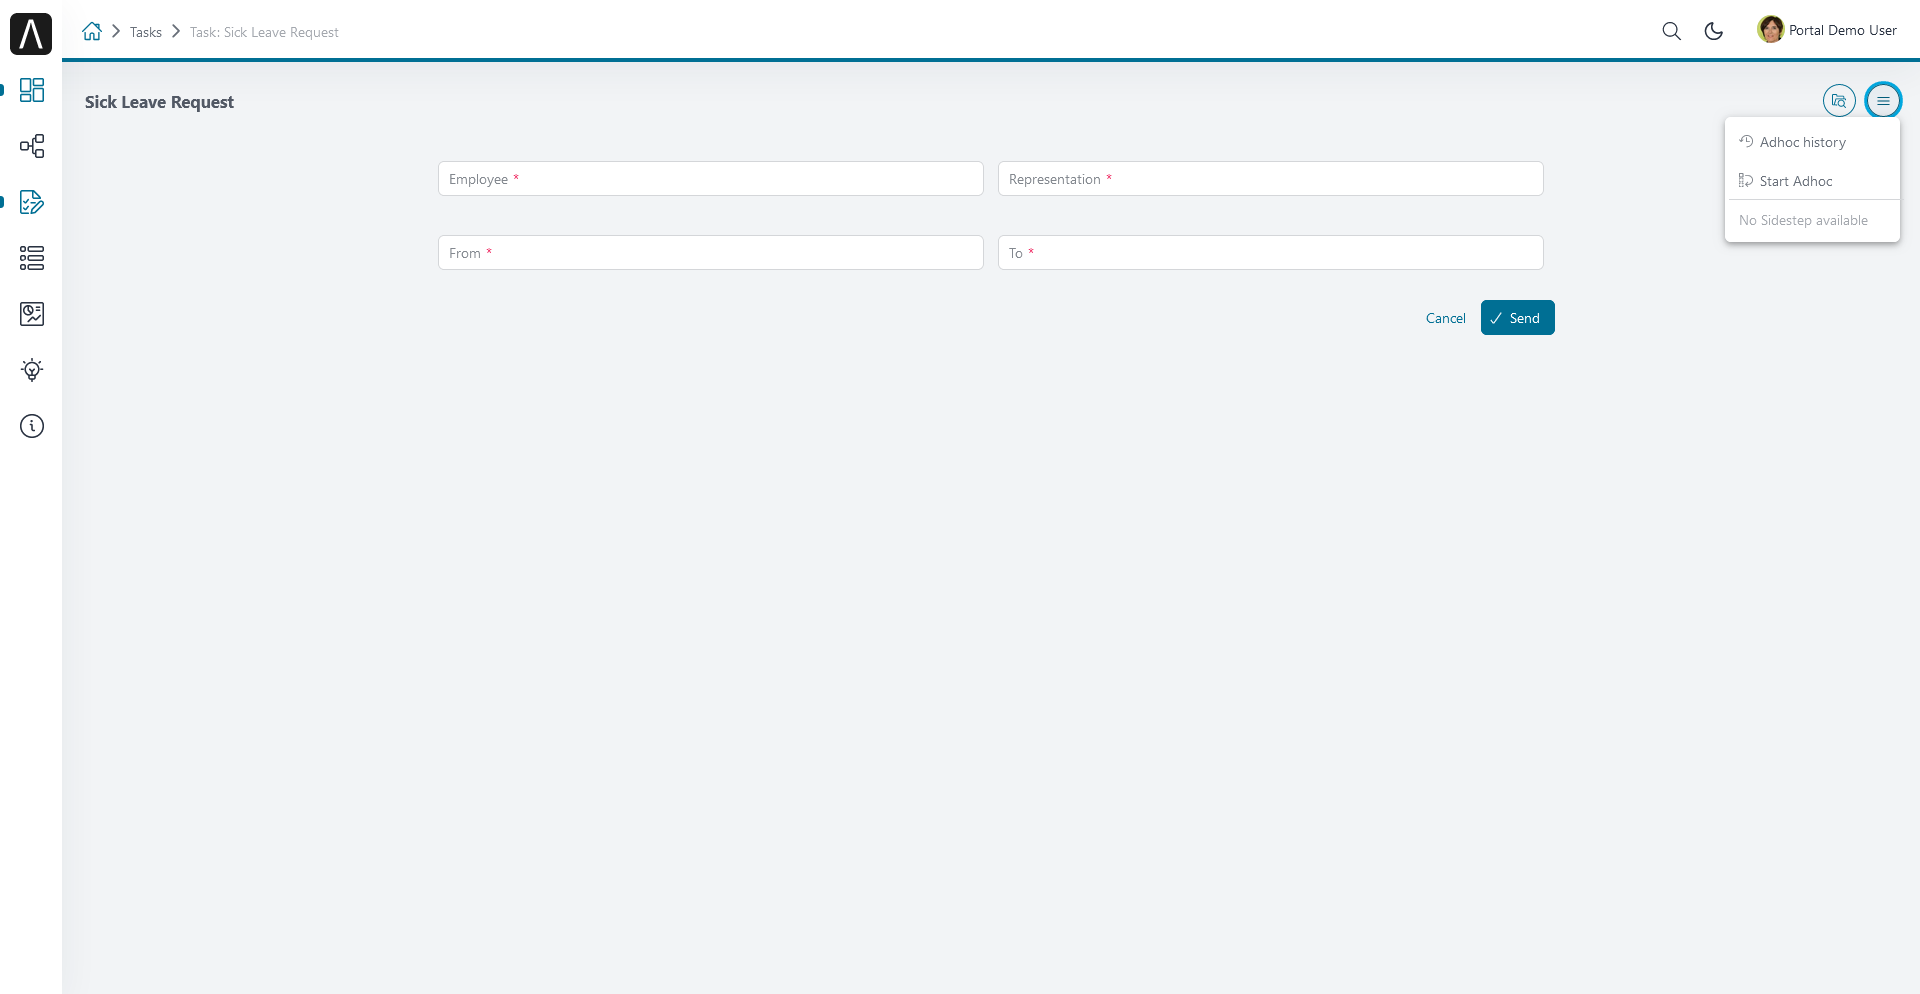
Ad Hoc Process
Axon Ivy Express also provides an ad hoc process feature. Onc Express is deployed, you can start an ad hoc process from any task. Ad hoc processes allow you to define more process steps and will be executed before the current task.
Start an ad hoc process by clicking on the menu icon at the top right in your task, then click on Start Adhoc
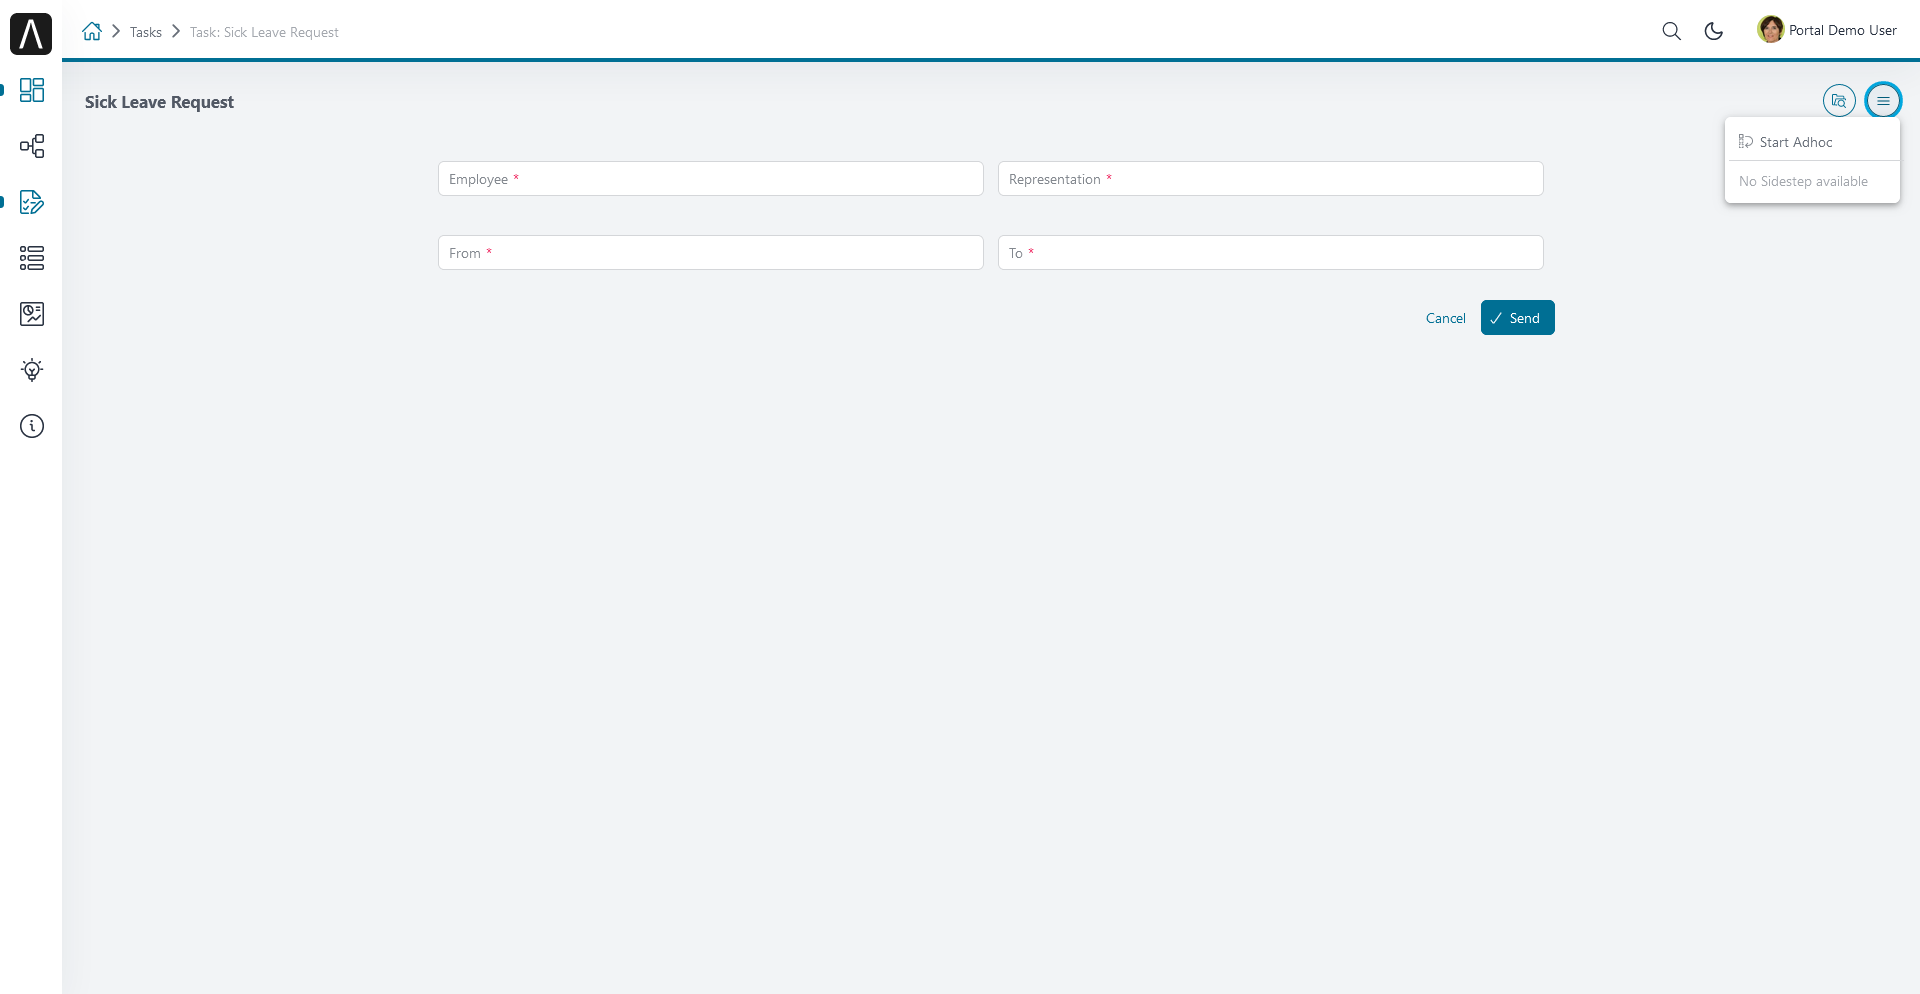
Important
Save the data of your current task before you start the ad hoc process.
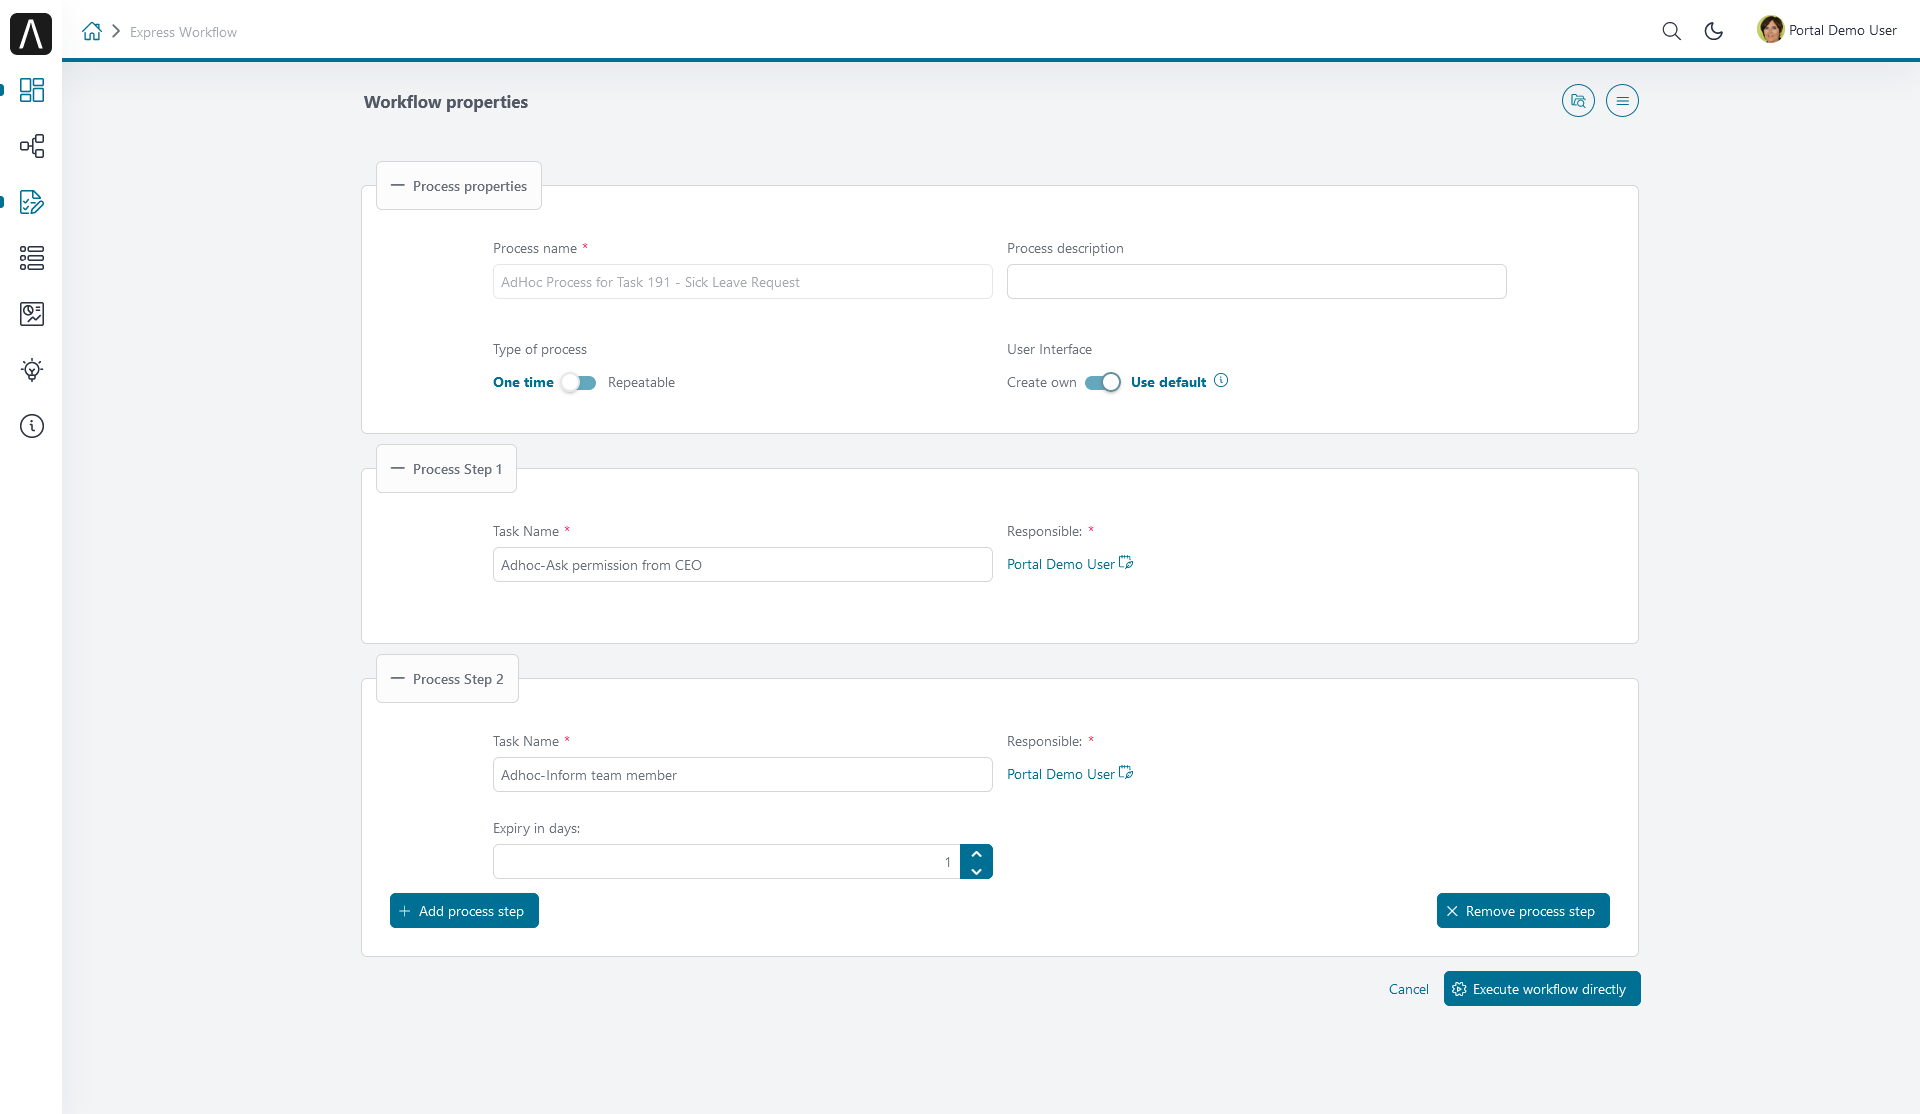
Then, define your ad hoc process.
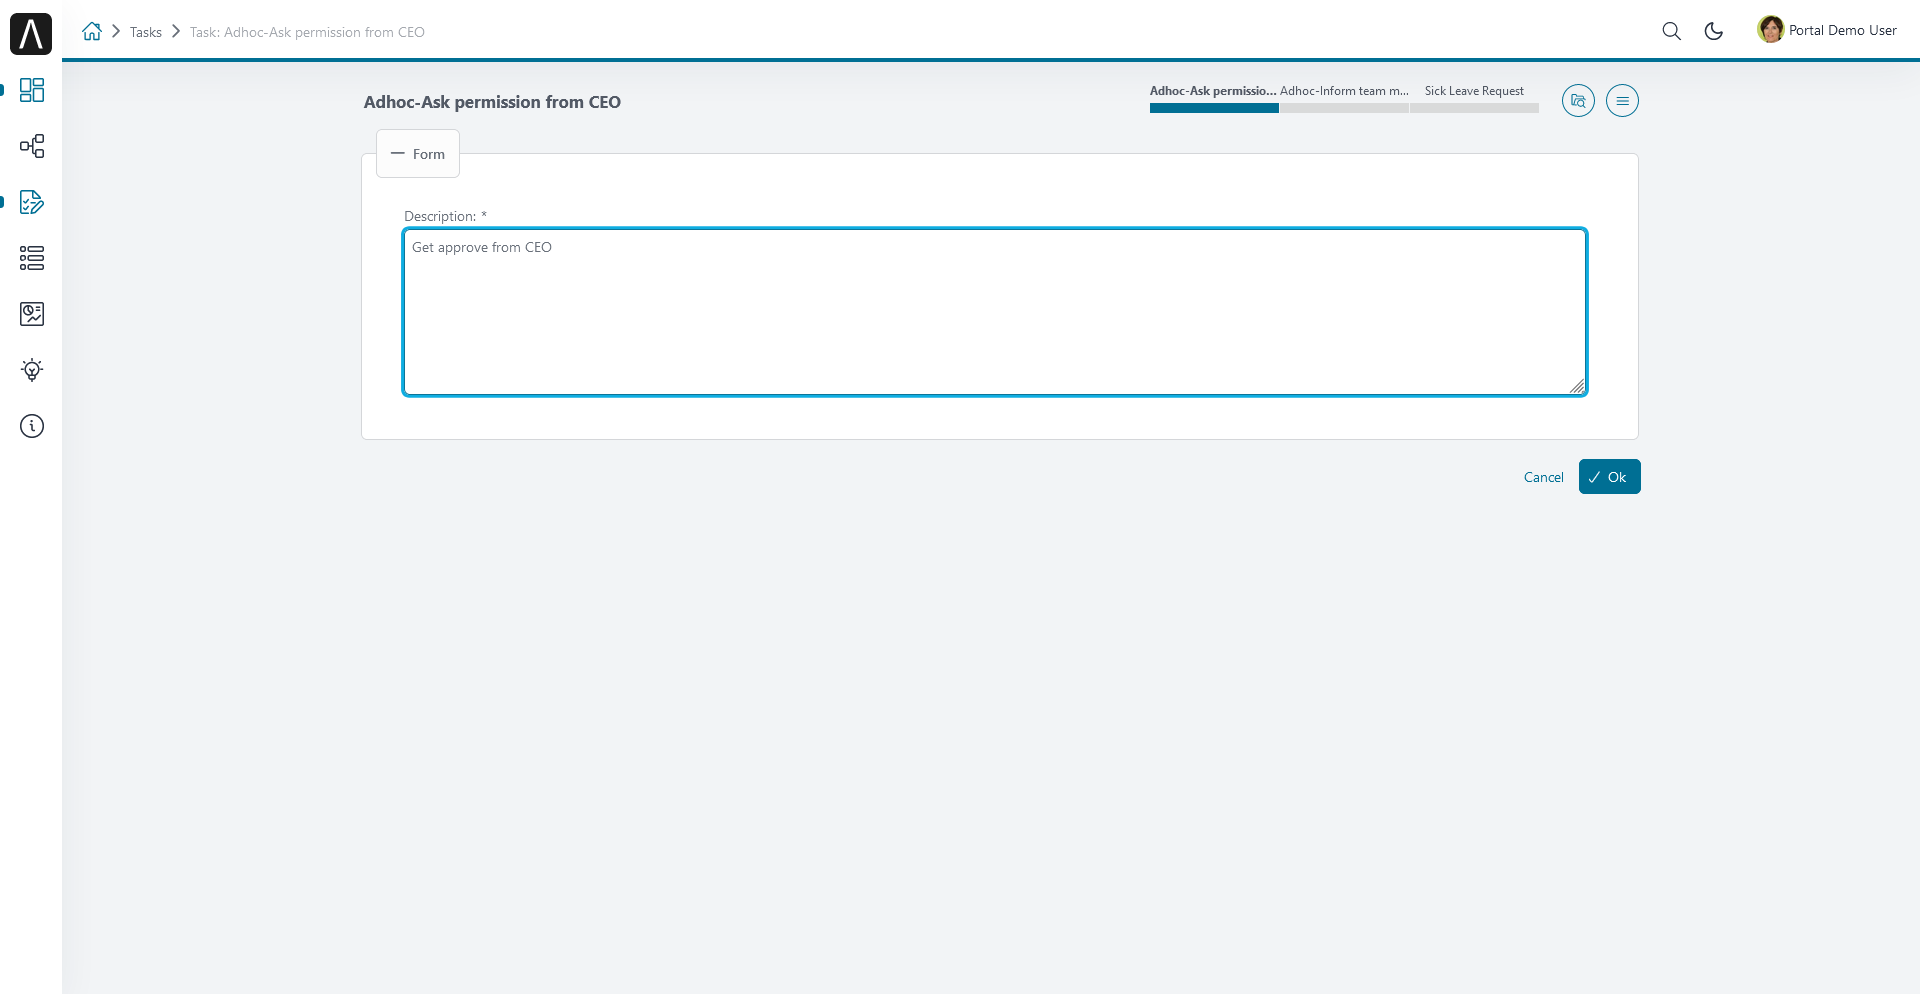
After starting the process, ad hoc tasks will be executed before your current task.
Finish all created ad hoc tasks to return to the original task
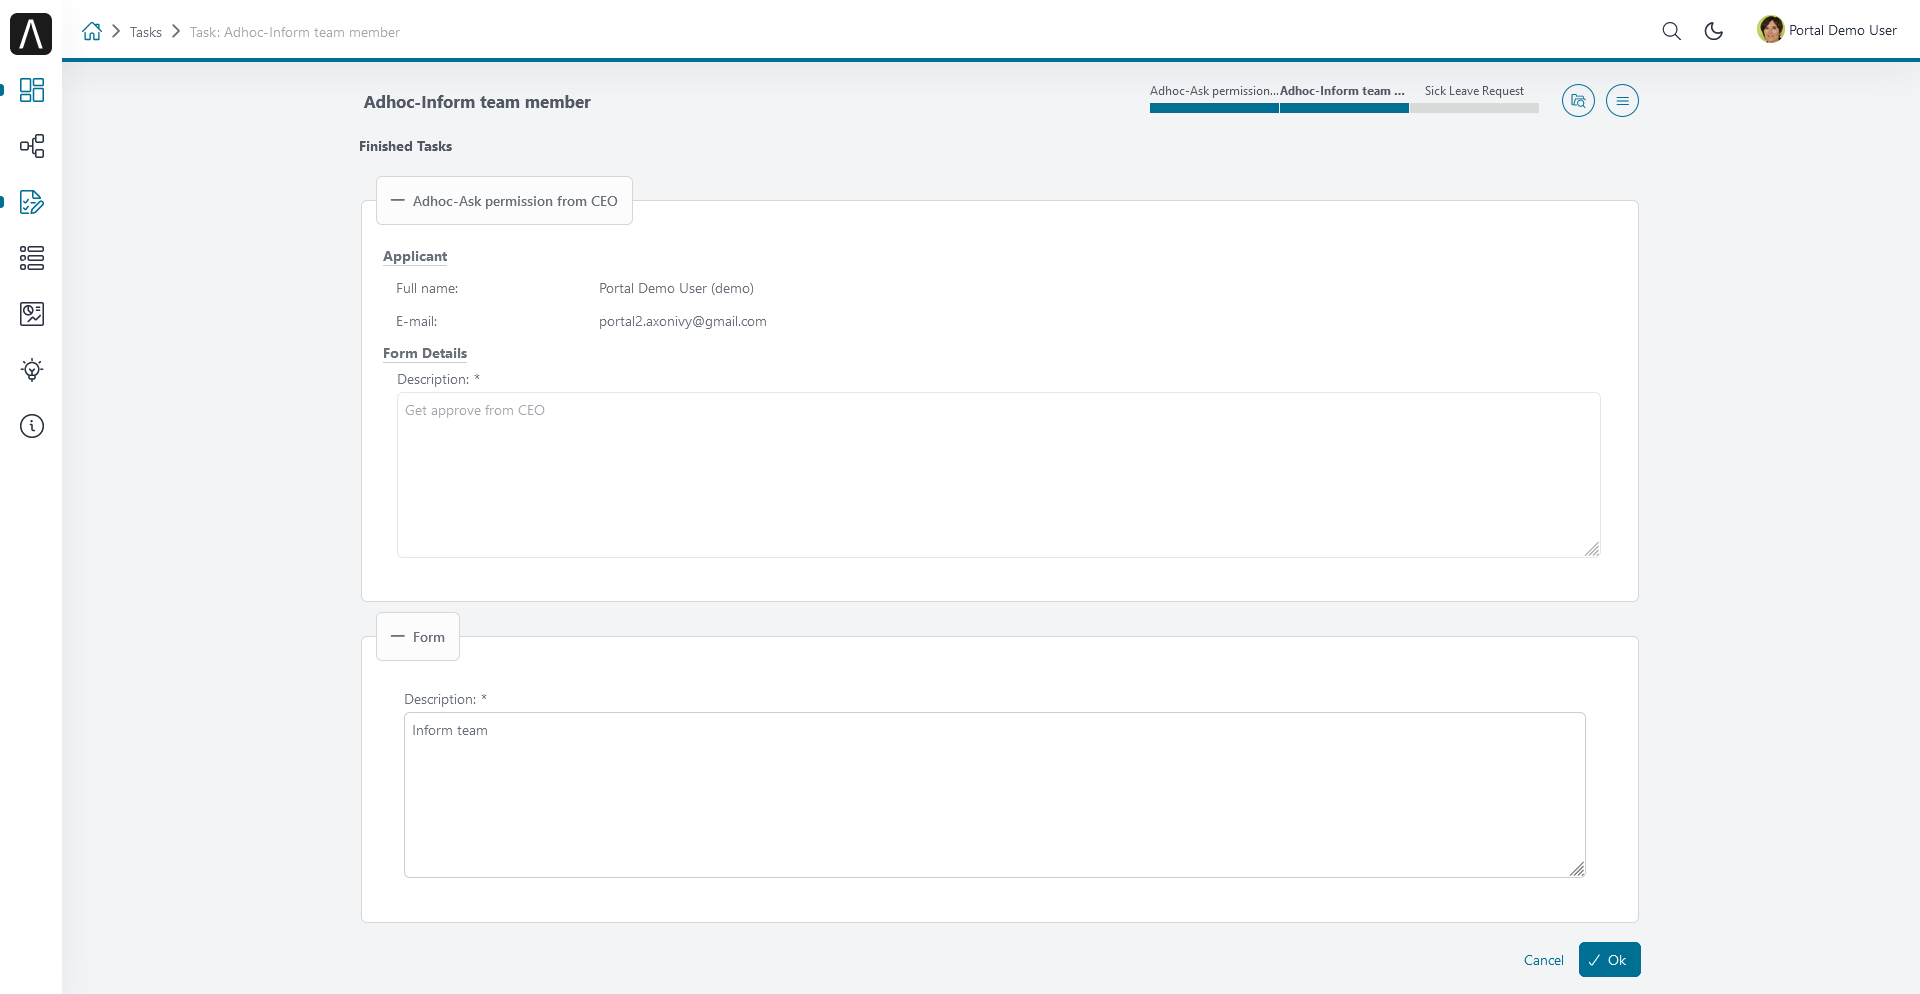
When you start your original task, you will see a summary of the ad hoc process in your task.
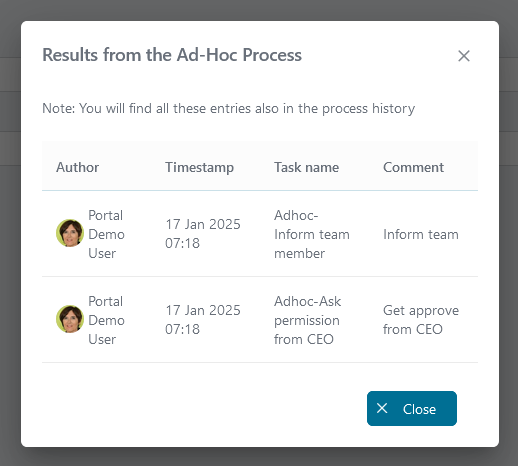
You can view the history again by clicking the menu icon, then click on Adhoc history.