Portal Header
The Axon Ivy Portal header is always visible. On the top right of the header you find two very useful features:
The name of the user you’re logged in with. Additionally, if you click on your username you get a menu with options that allow you to configure the Axon Ivy Portal to your personal needs. See User Settings in the Axon Ivy Portal for a detailed overview of the configuration options.
Next to your username is a
 Search Bar providing you
with a portal-wide search. This feature is described in detail in
Global Search.
Search Bar providing you
with a portal-wide search. This feature is described in detail in
Global Search.

User Settings in the Axon Ivy Portal
When you click on your username in the top right of the Axon Ivy Portal, a menu is shown allowing you to configure the portal to your personal needs. These features are described in the following sections below.
Admin Settings
Menu entry Admin Settings is only available for users have role AXONIVY_PORTAL_ADMIN.
Absences
The menu entry Absences provides you with an absence management component. Here you can enter your absences and define delegates for tasks assigned to you or one of the roles you hold.
Hint
Although you can specify delegates for a role you hold, we recommend specifying only delegates for tasks assigned personally to you. Roles are normally held by a group of users, so if you’re absent one of your role members is still able to pick the task.
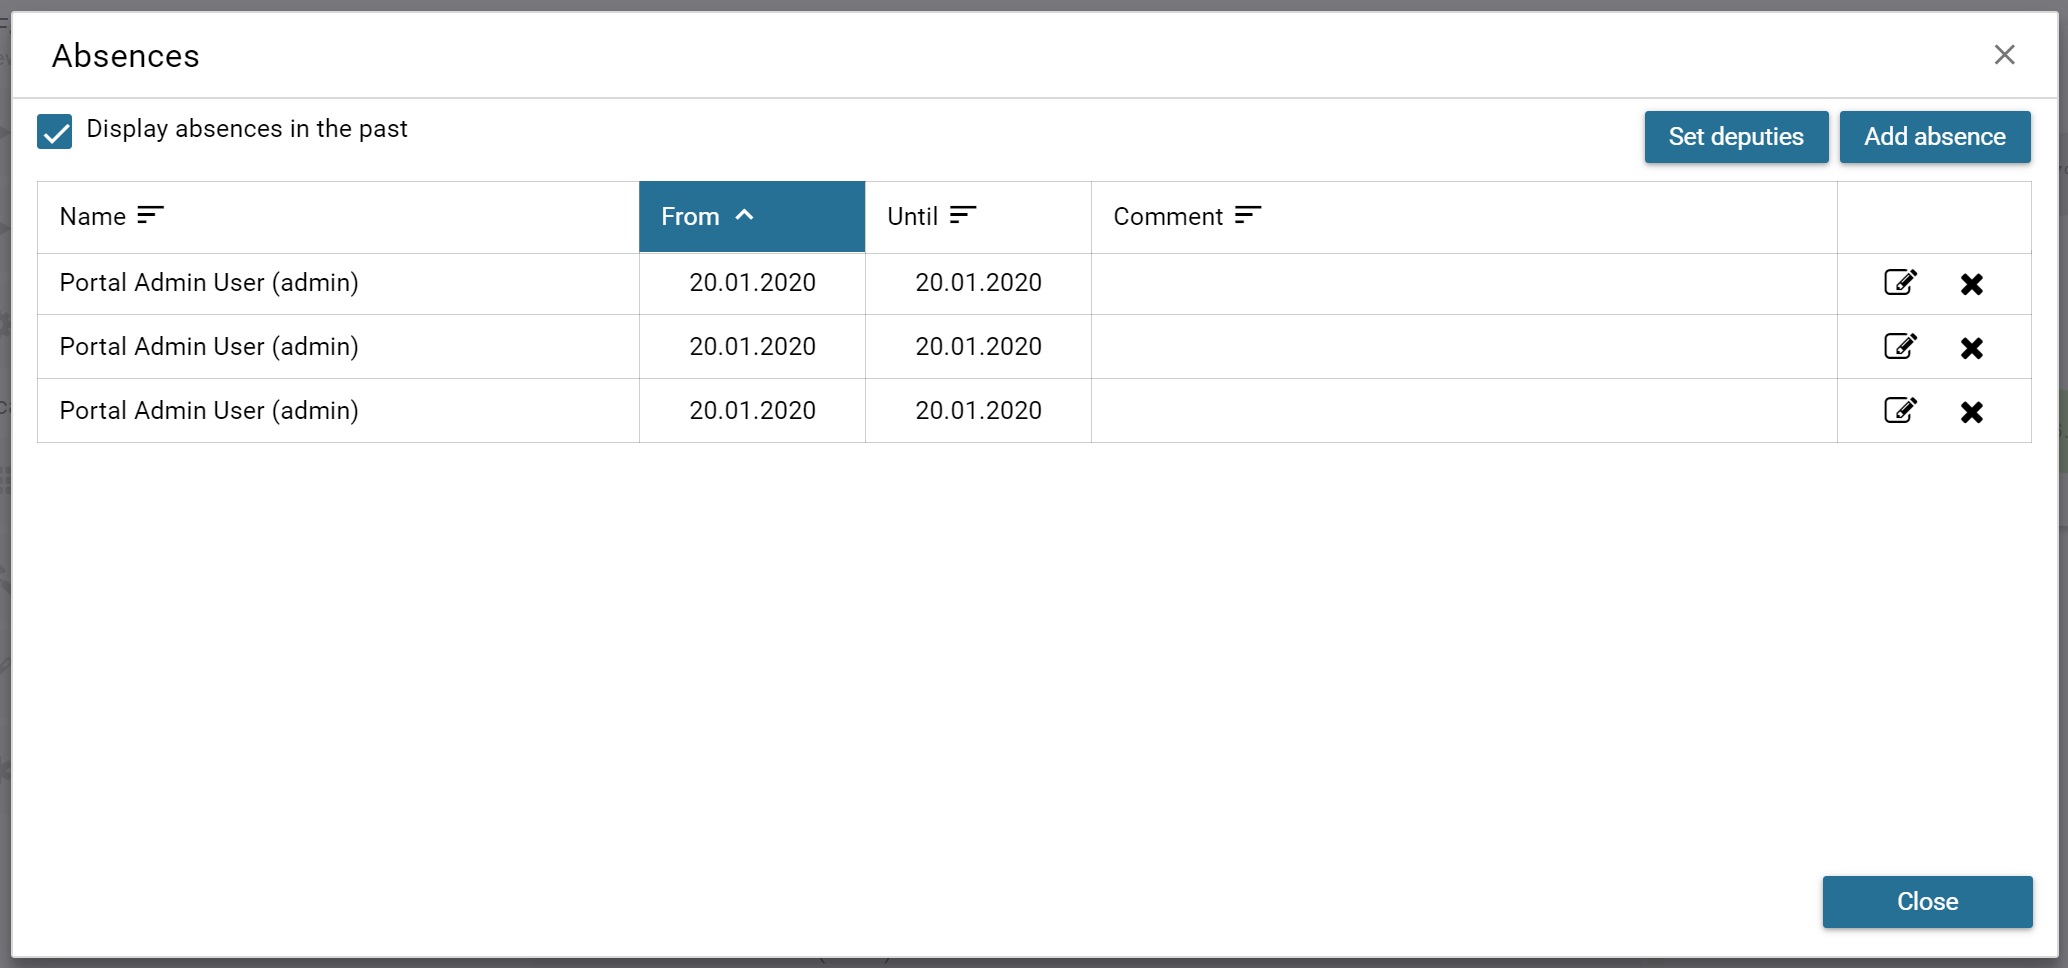
The dialog shows you all current and upcoming absences. You may show also past
absences by activating the option Show absences in the past. Furthermore,
you can edit or delete absences by using the ![]() Edit or
Edit or ![]() Delete action in the row of the respective absence.
Delete action in the row of the respective absence.
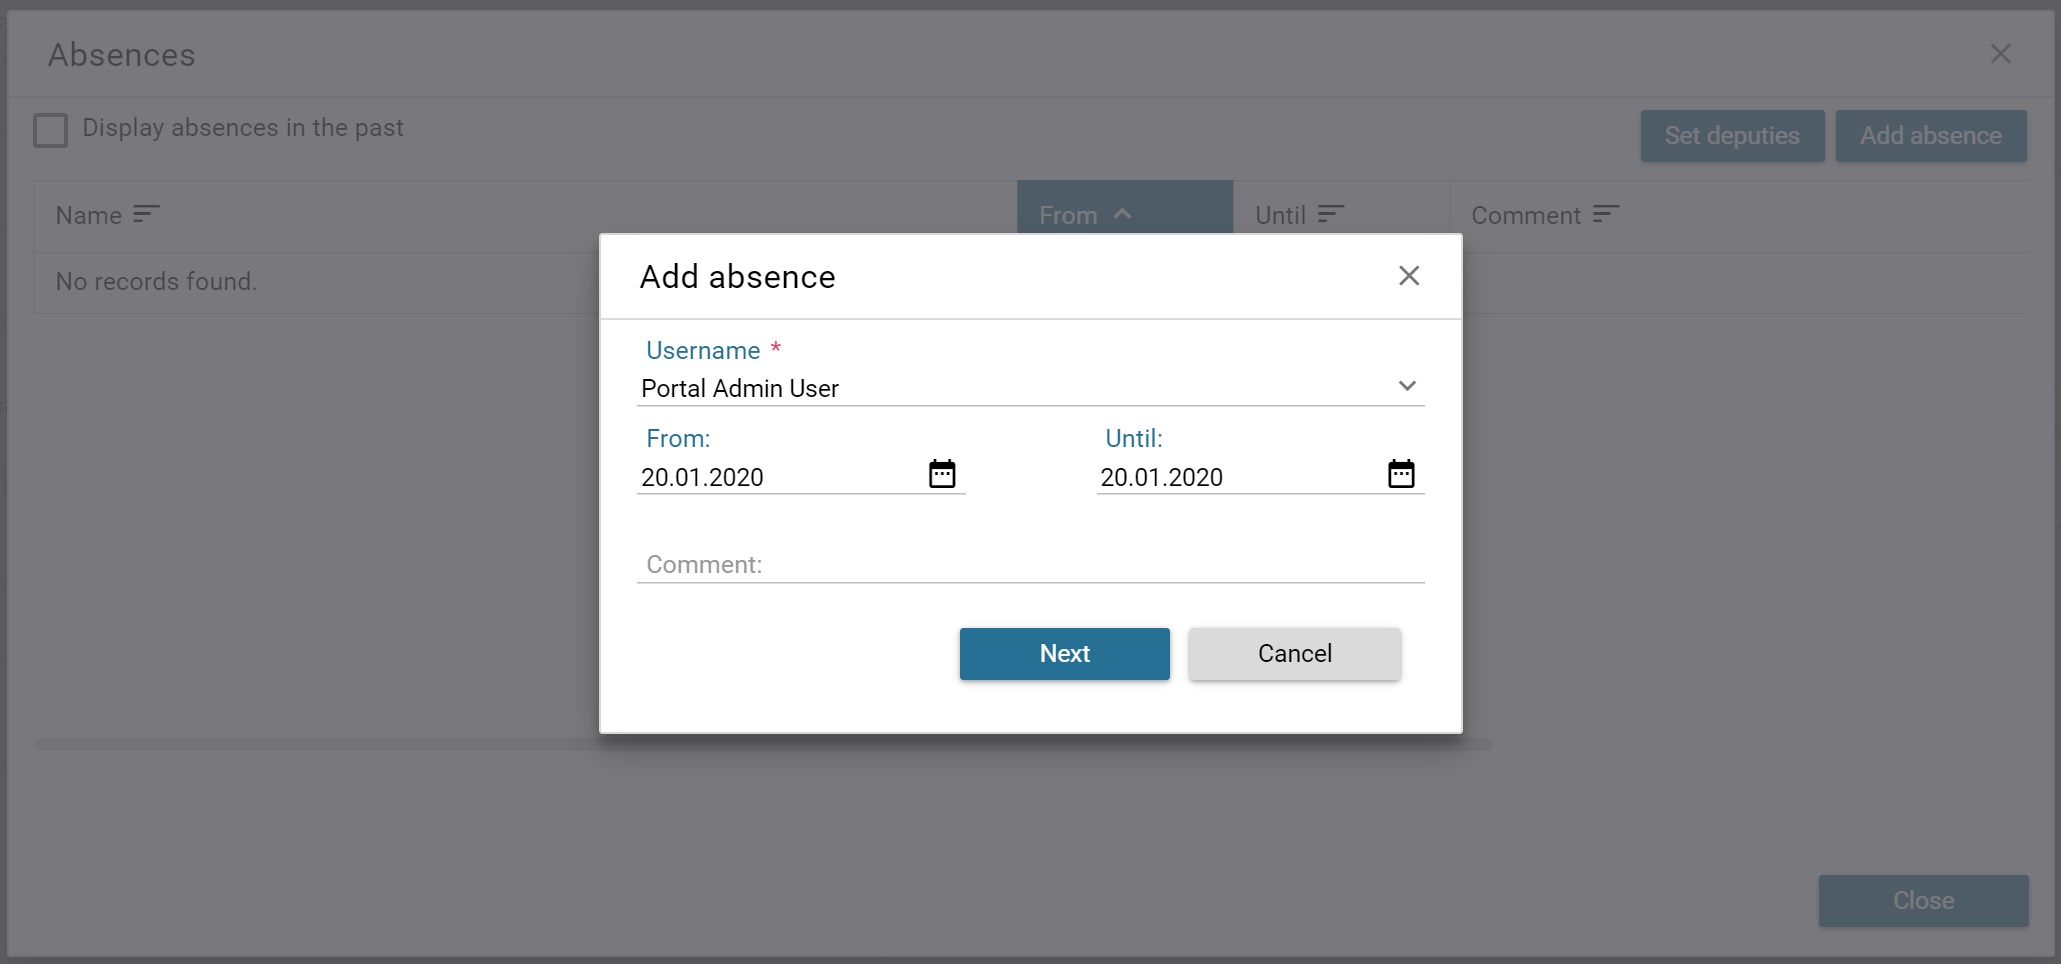
HowTo: Add absence
Click on the button Add absence
The Add absence dialog is opened
Enter a start date
Enter an end date
You may provide an explanatory comment
Confirm your absence with the button Next
You are forwarded to the Set deputies dialog (see HowTo: Set deputies).
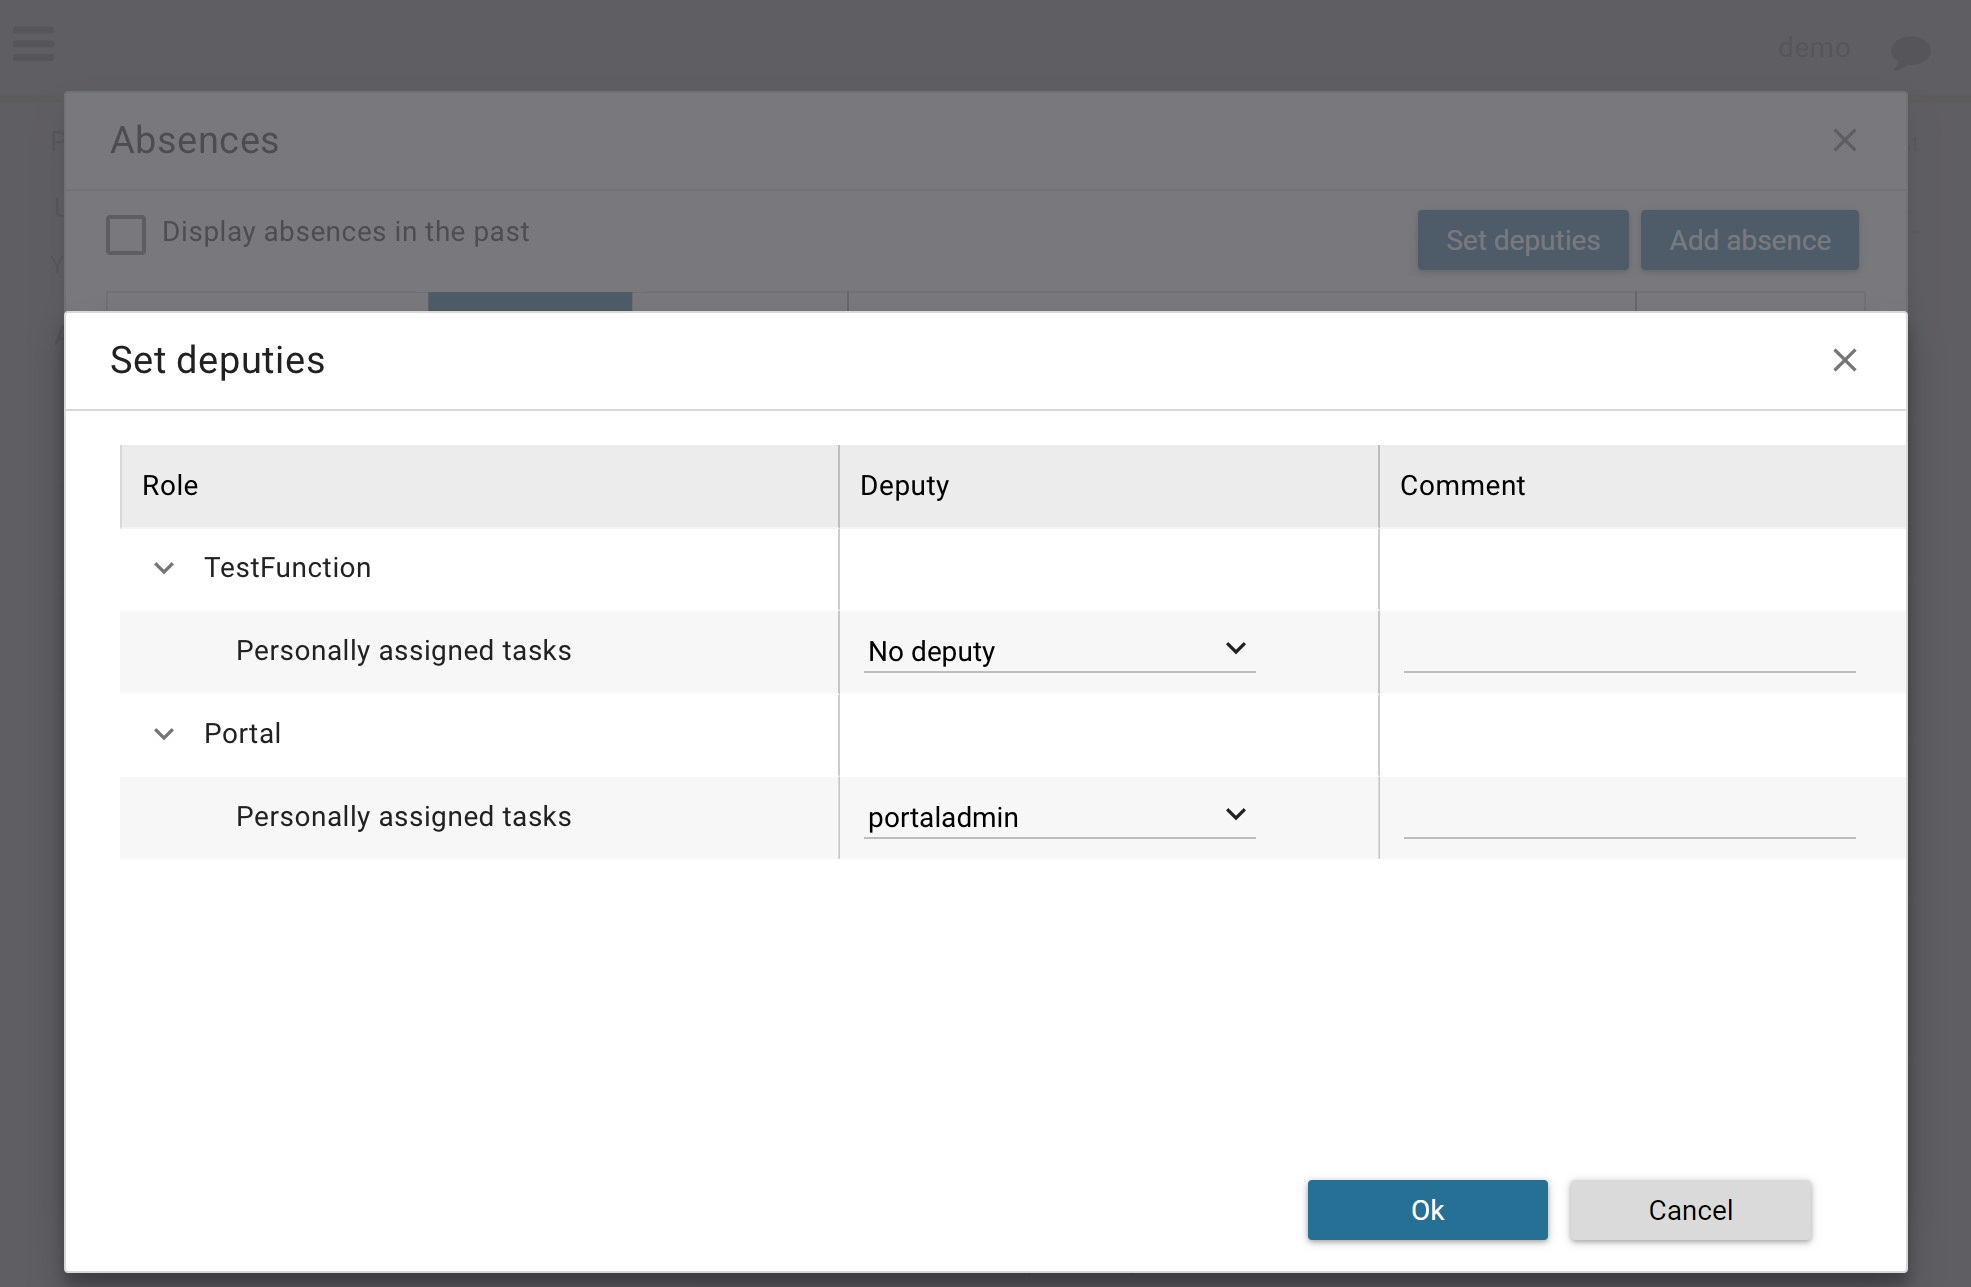
HowTo: Set deputies
Click on the button Set deputies. Alternatively, you’re forwarded to this dialog after you added an absence.
The Set deputies dialog is opened.
You see a list with an entry for your personal tasks and for each role you hold.
Specify a deputy by selecting him from the list.
You may add a comment
Confirm your deputies with the button OK.
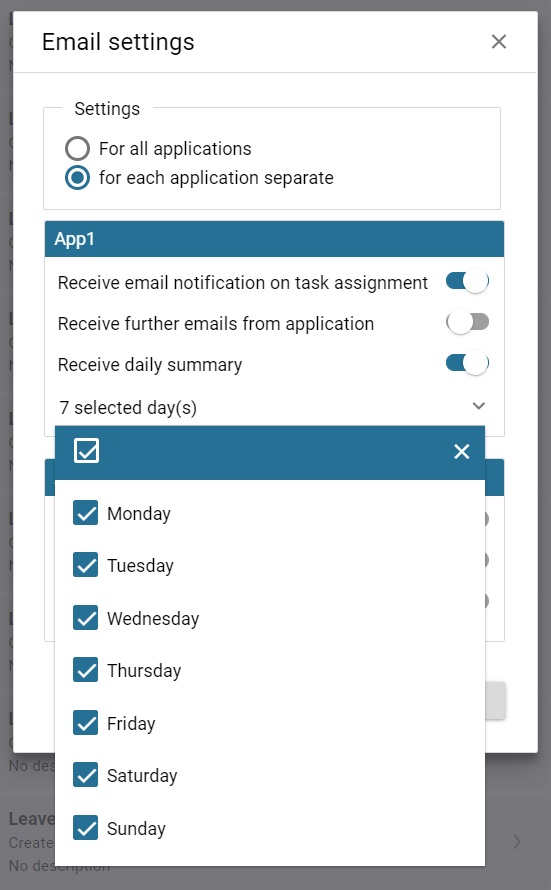
Email settings
The menu entry Email settings allows you to configure your preferences related to standard email notifications send by the Axon Ivy Engine.
Hint
If configured by your company’s application, you might also be able to configure application specific email notifications.
The Email settings dialog provides you with the following configuration options:
The option For all applications allows you to use one configuration for all applications. It is important to note, that in the background these settings will be applied to all available applications.
The option For each application separate allows you to provide individual settings for each available application.
The option Receive email notification on task assignment allows you to specify if you want to receive an instant notification when a task is assigned to you or one of the roles you hold.
The setting Receive daily summary allows you to specify the weekdays when you receive a summary of all tasks assigned to you or one of your roles.
The option Receive further emails from application allows you to activate / deactivate further email notifications.
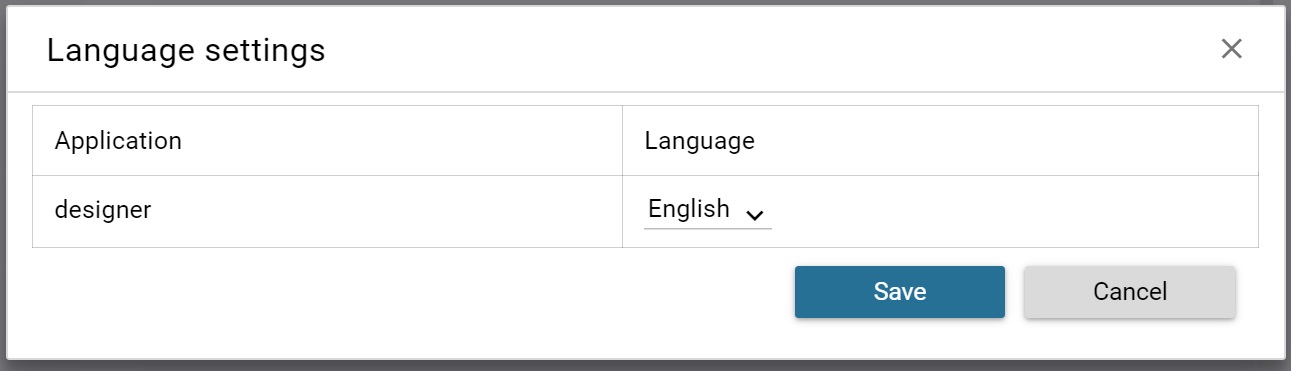
Language Settings
The menu entry Language settings allows you to specify your preferred application language. The setting will affect all Axon Ivy Portal pages and – if supported – your companies applications pages as well. The following languages are currently supported in the Axon Ivy Portal:
English
German
French
Spanish
Hint
Your application needs to support the same language as the one selected in this menu. Otherwise the application specific content will be shown in the standard language of the application. E.g. if your application only supports English, but you select Spanish as the portal language, your application specific dialogs will still be shown in English.
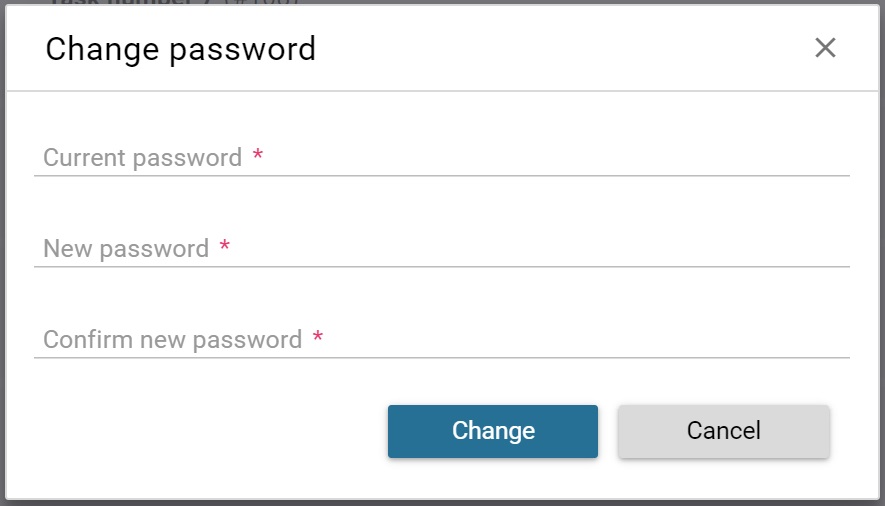
Change Password
The menu entry Change password allows you to set a new password.
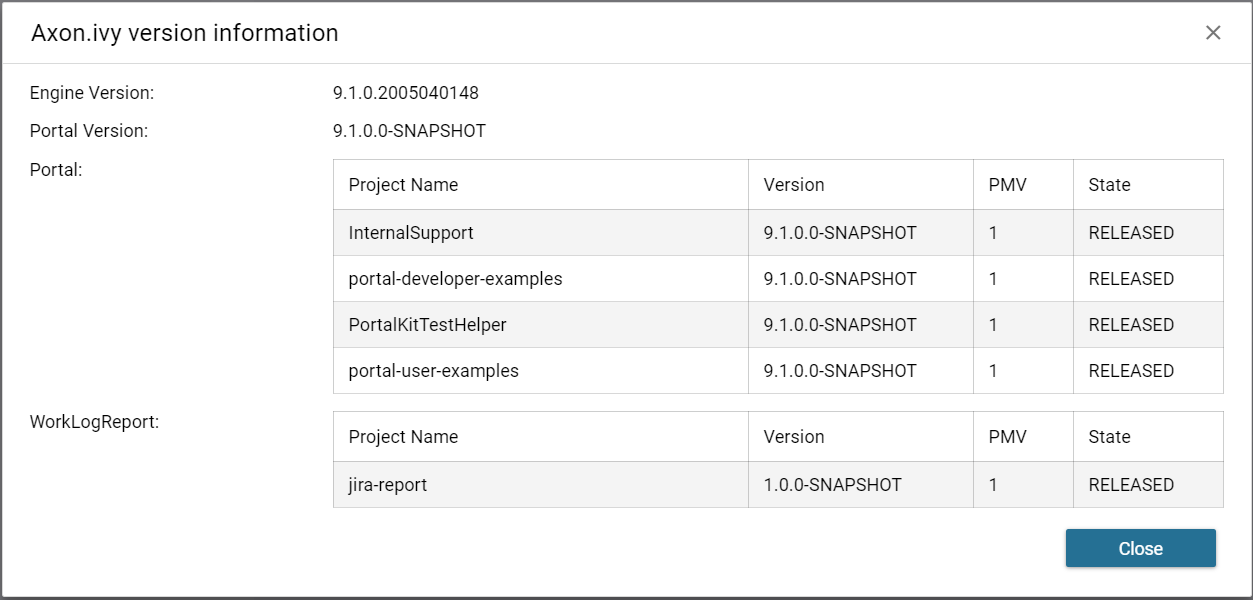
Info
The menu entry Info provides you with detailed information about the Axon Ivy Engine, the Axon Ivy Portal and your companies application. You might be asked for this information in case you issue a support request.
Logout
The menu entry Logout will terminate your session in the Axon Ivy Portal. You’ll be routed back to the login page of the Axon Ivy Portal.
Hint
The Axon Ivy Portal will also do an automatic logout if you’re inactive for a certain amount of time.
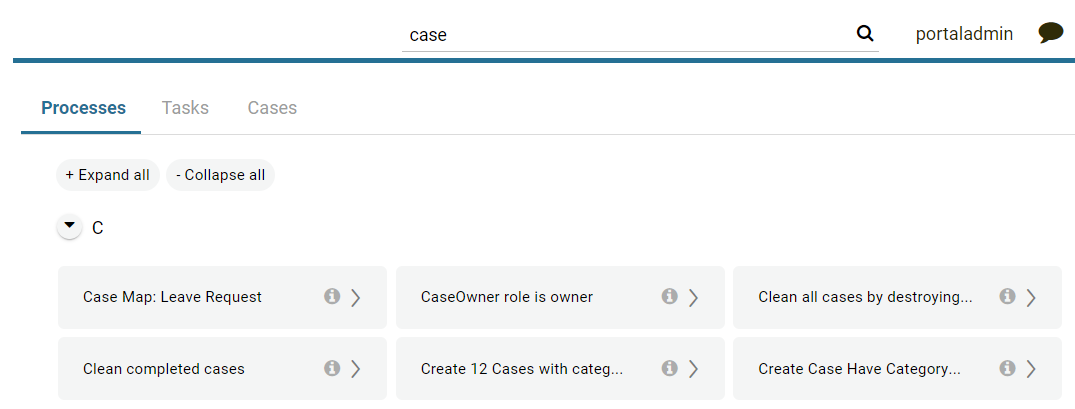
Global Search
The Global Search is a convenient tool for you to look up information in the whole Axon Ivy Portal. You may search for any keyword. By default, the Axon Ivy Portal will search for:
Processes
Cases
Tasks
When you confirm the keyword you’re looking for, the Axon Ivy Portal will route you to the Global Search Results page. For each category a tab is provided, giving you the results of your search.
Hint
Your company’s application may provide further search capabilities which are integrated in the Axon Ivy Portal Global Search. You’d find the results on the result page accordingly. Contact your administrator for more information.