Full Case List
The Full Case List page is a dashboard featuring a single, full-width task widget.
You can reach the page by using the  Cases link in the Axon Ivy Portal menu.
Note
Grant permission 🔑AccessFullCaseList if Cases is not visible.
Hint
The set of cases you see in the Portal depends on the roles you hold in in your applications.
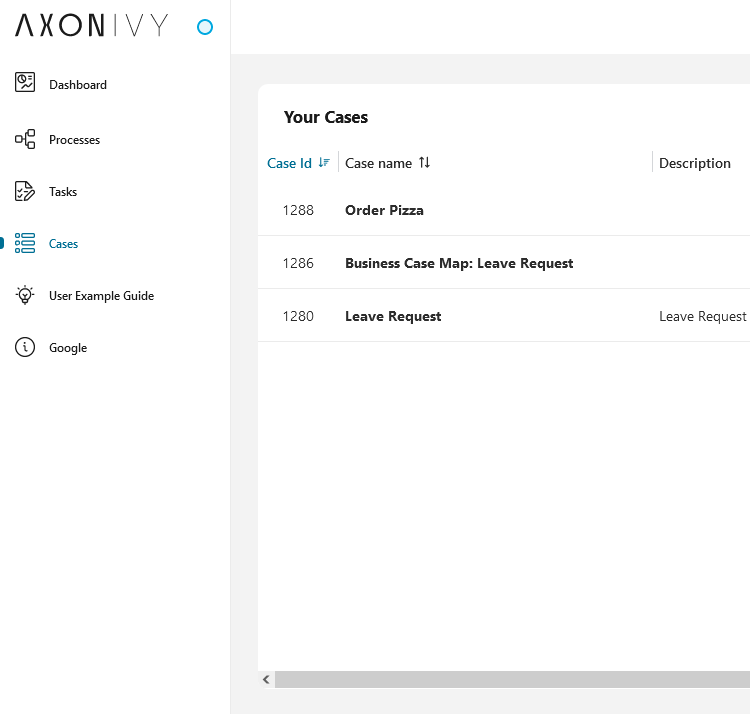
For each case, the list shows the following key information:
Case ID
Name
Description
Creator
Creation Date
Finished Date
State
Category
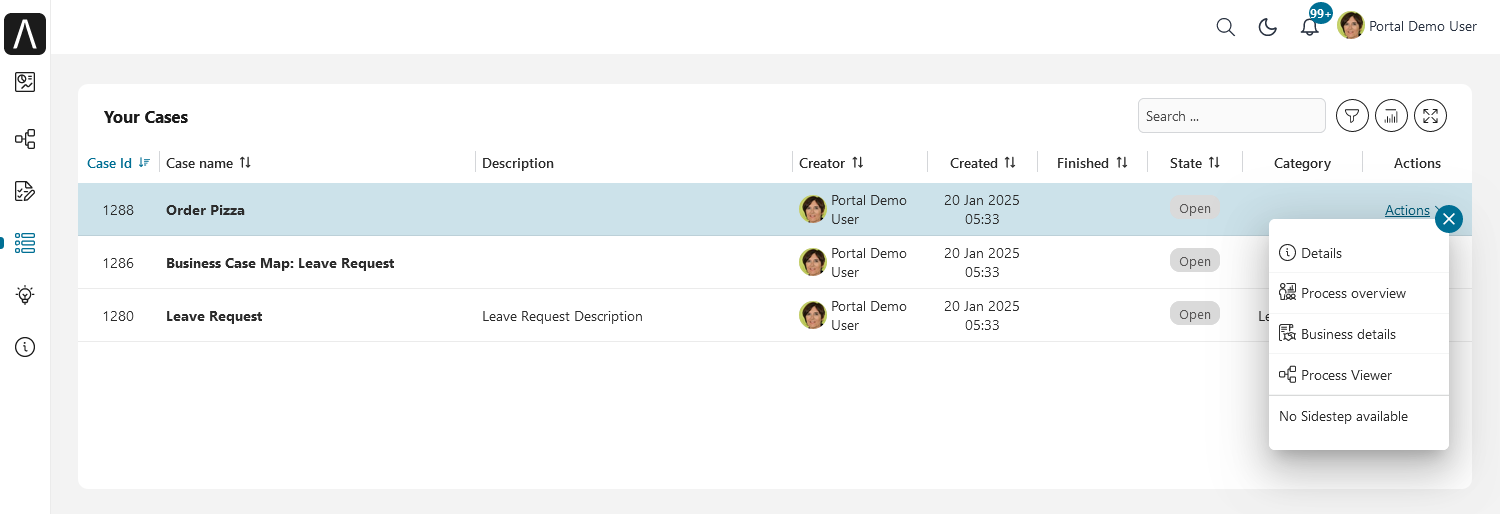
At the end of each row you find a set of key features to handle cases by clicking on Actions.
To access the full set of case data, click on the case Name/Description.
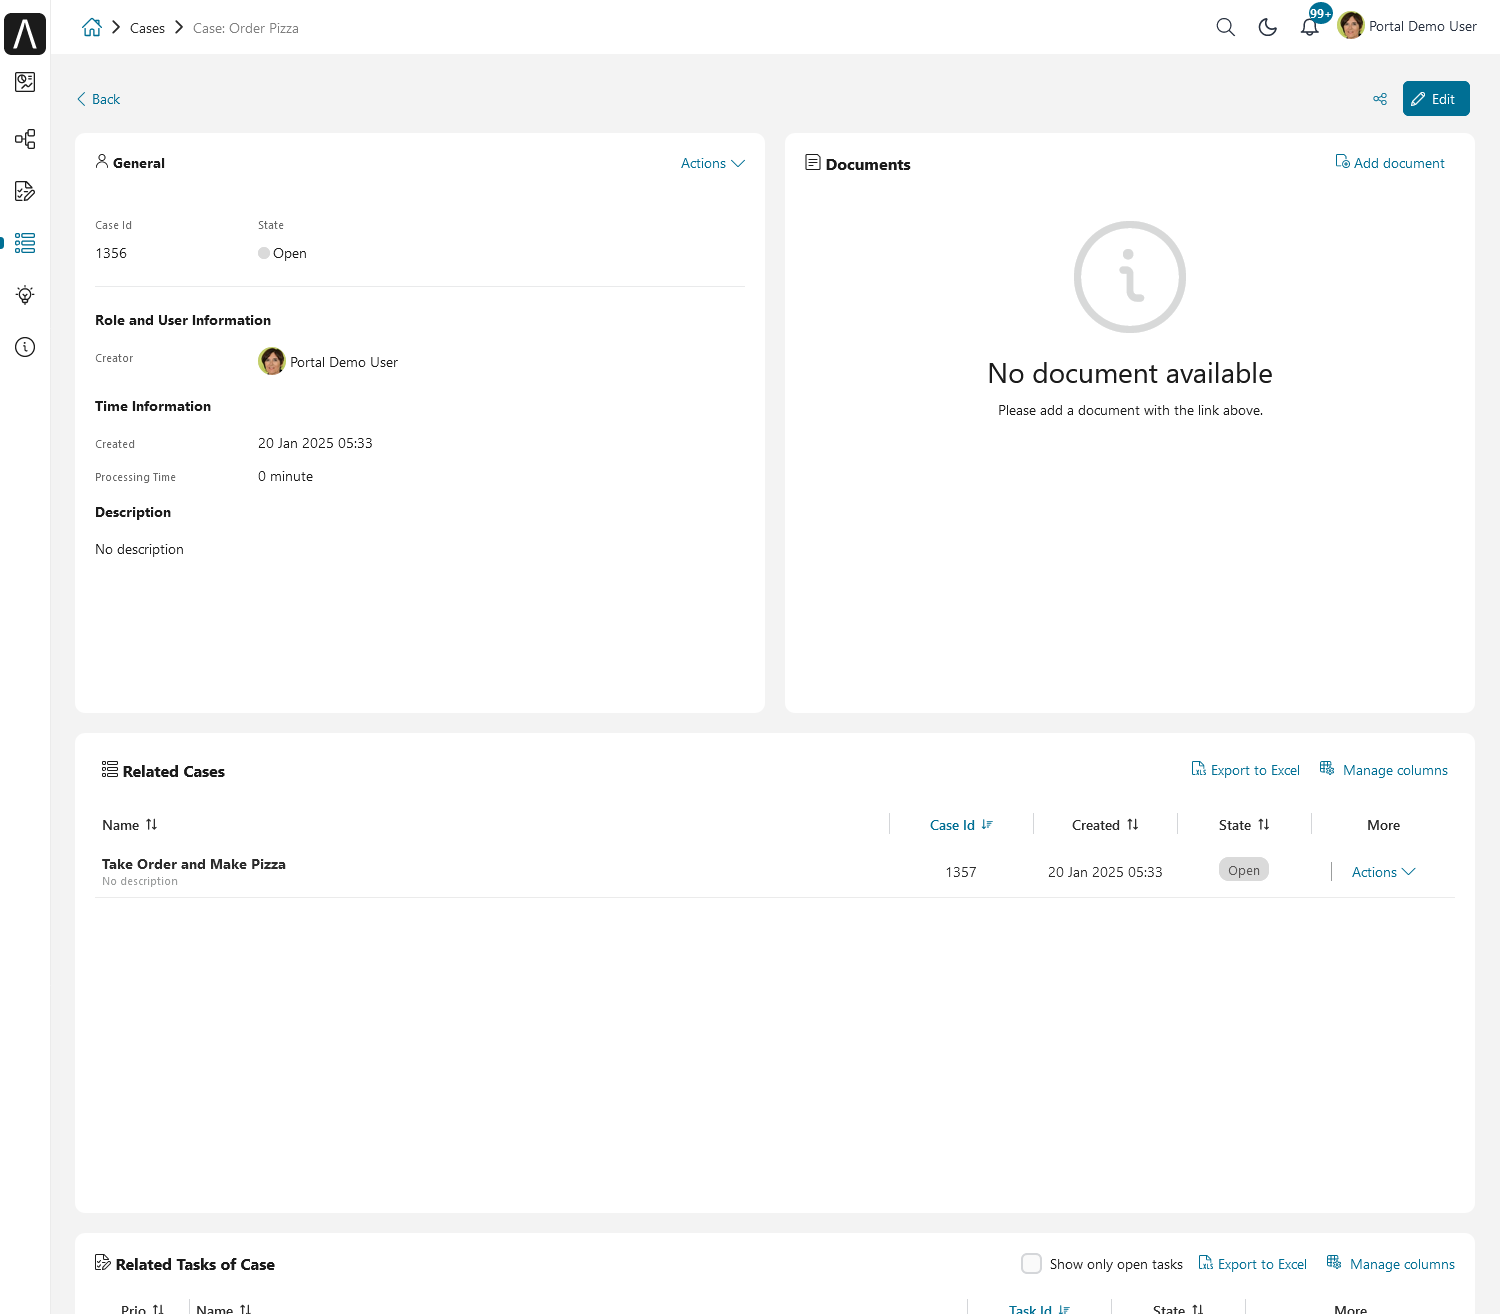
The case details are separated into four different sections:
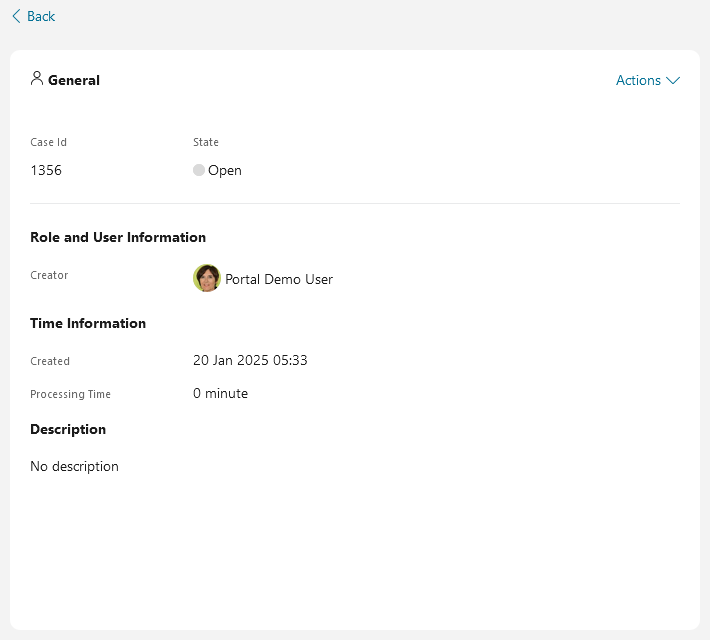
Data and Description: Contain various metadata of the case and its description.
Related running tasks and cases: Contains a list of all related running cases and tasks. Moving the mouse over a task shows you both state and responsible user. To show all related tasks see the HowTo below.
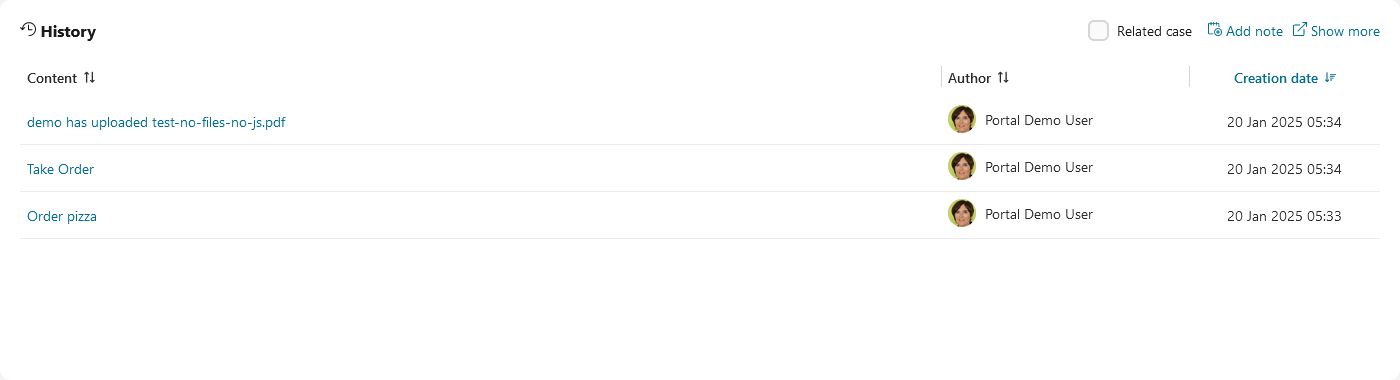
Histories: The Axon Ivy Portal adds notes here for state changes of the case. You may add your own notes as described below.
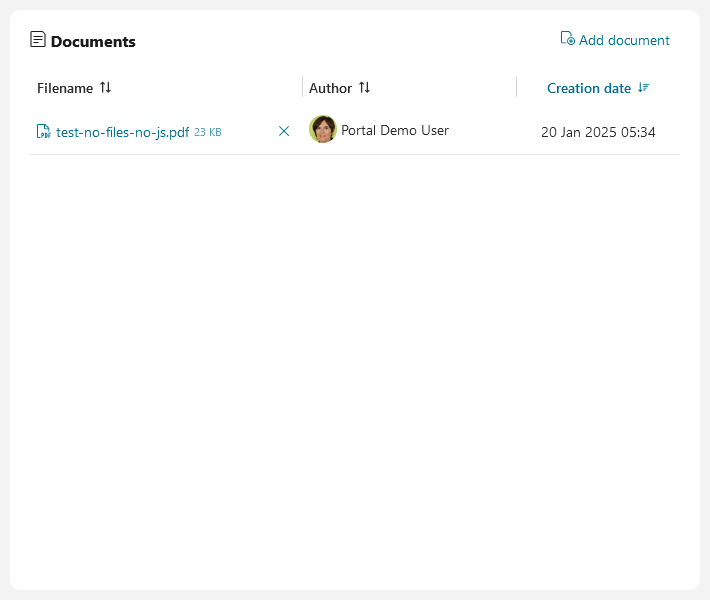
Documents: Here, documents attached to the case are listed. You may add. delete or preview documents as described in the HowTo’s below.
HowTo: Move and Resize Widgets in Case Details
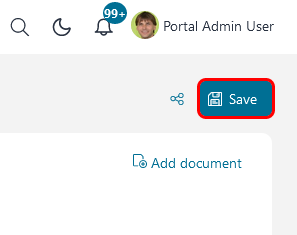
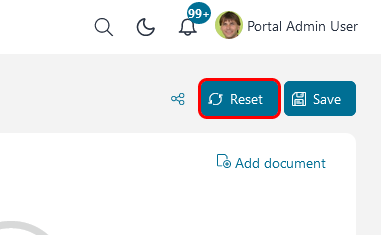
Open the case details
Click on the Edit button to drag, drop and resize widgets.
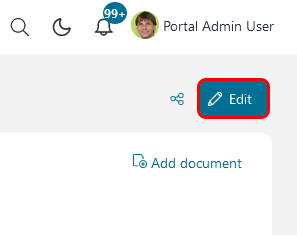
Click on the Save button to save the current state of the page and switch to read-only mode.
Click the Reset button to reset the widget to its default configuration.
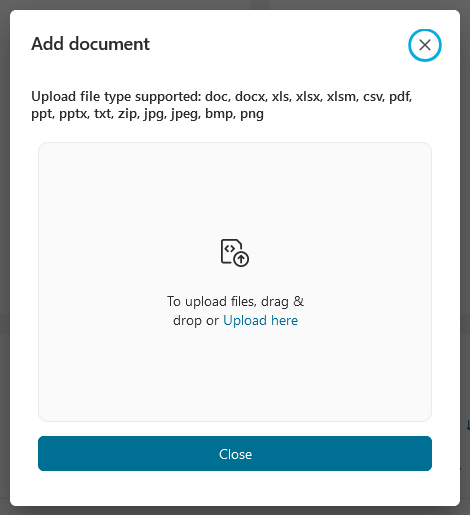
HowTo: Attach a document to a case
Open the case details
Click
 Add document
The Add document dialog is opened
Upload a file by clicking Upload here or by dragging the file into the dialog
Click Close close the dialog
Note
Grant either permission 🔑DocumentOfInvolvedCaseWrite or 🔑DocumentWrite to allow a user to write case documents.
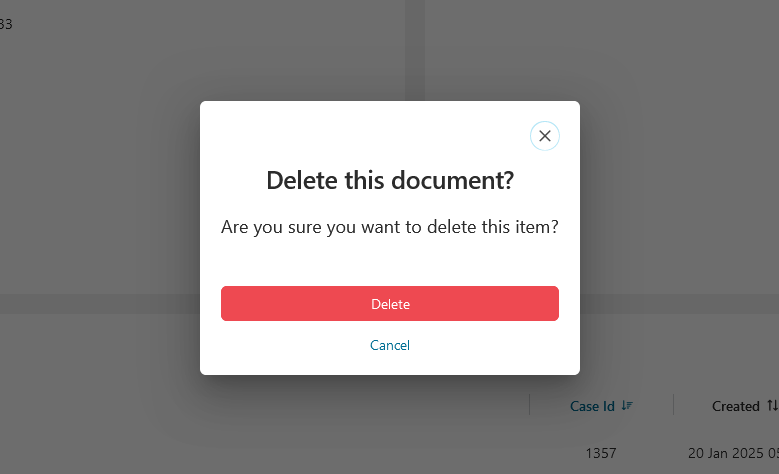
HowTo: Remove an Attachment from the Case
Open the case details
Click on the
 button next to the
attachment you want to remove.
button next to the
attachment you want to remove.A confirmation dialog is opened
Click Delete to remove the attachment
Note
Grant either permission 🔑DocumentOfInvolvedCaseWrite or 🔑DocumentWrite to allow a user to delete attachments from a case.
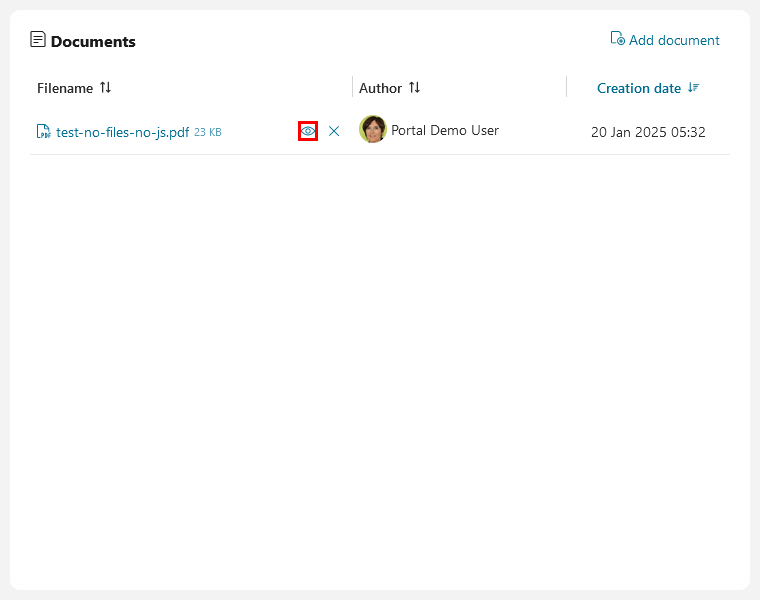
HowTo: Preview a document of a case
Open the case details
Click on the
 button next to the attachment you want to preview
A preview dialog is opened
Click the button Close to close the dialog
Note
Portal can preview images, plain text(txt and log) and pdf documents.
Change Portal settings Portal.Document.EnablePreview to true to enable this feature.
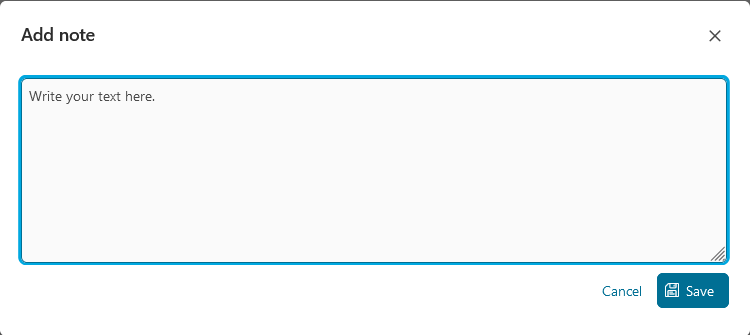
HowTo: Add a Note to a Case
Open the case details
Click on the
Add notelink below the notes section.The Add note dialog is opened.
Enter your note.
To save your note, click Save.
Note
Notes of a technical case are displayed on the Notes table of the case, and its tasks.
Visibility rule for notes of business case:
Displayed in the
Historytable of the case details and its direct tasksDisplayed in the
Historytable of its technical case details.Not displayed in the
Notestable of tasks belong to technical case.
Grant permission 🔑TaskCaseAddNote to allow a user to add a note to a case.
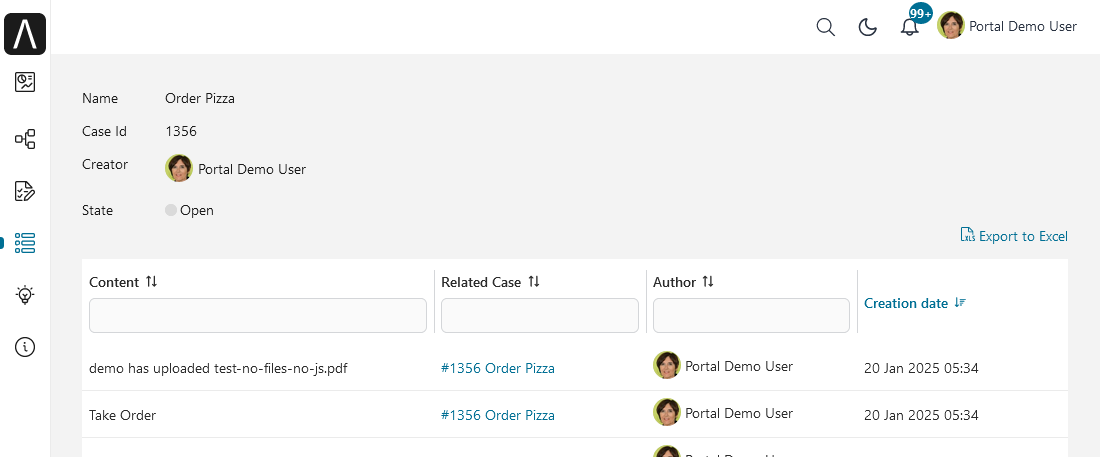
HowTo: Export a Case History
Open the case details
Click on
 Show more below the notes section
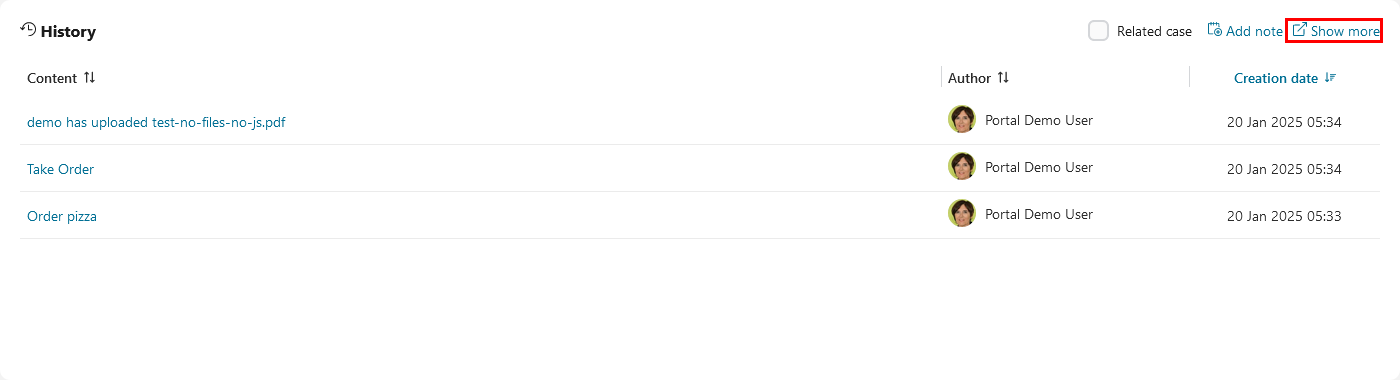
A page containing the case history is opened
To export the case history, click on Export to Excel
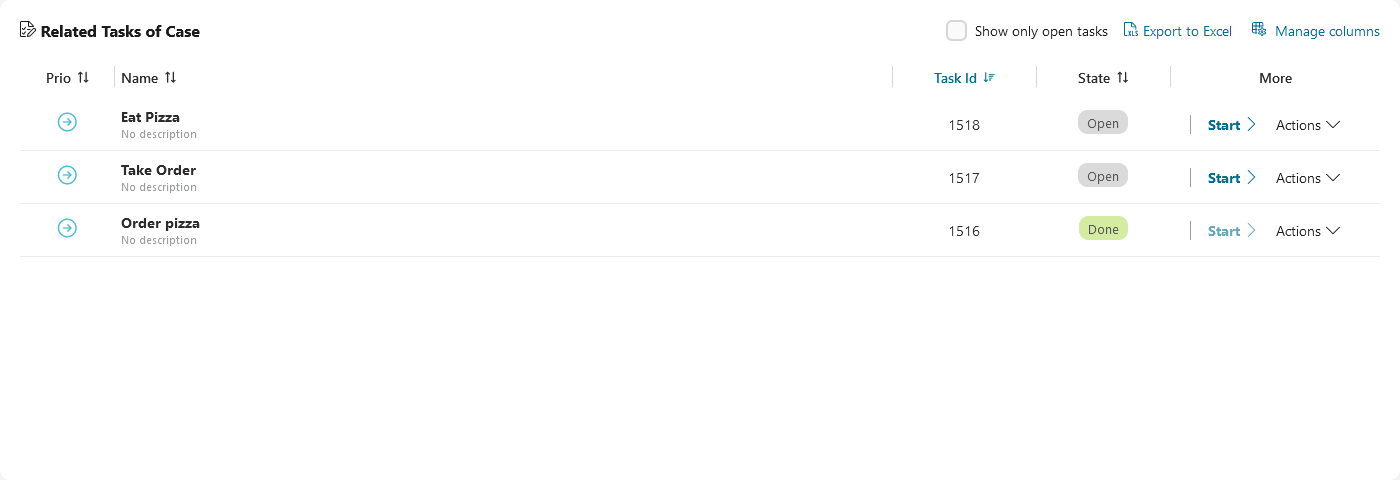
HowTo: Manipulate Related Tasks Inside Case Details
Open the case details
Scroll to Related Tasks of Case
This section shows you the related tasks of this case.
Hint
What you see here depends on the roles granted to you in both the application and the Axon Ivy Portal. Administrators can see all open tasks.
Note
Grant either permission 🔑TaskReadOwnCaseTasks or 🔑TaskReadAll to allow a user to see all related tasks of a case.
The list shows the following key information for each task. To change the columns displayed, click on Manage columns. Select from the following columns:
Priority
Name
Description
Responsible user or role
Task ID
Creation Date
Expiry Date
Finished date
State
At the end of each row, a side step menu is available. It offers the following actions:
Reset Task
Delegate Task
Reserve Task
Destroy Task
Trigger Escalation Task
Workflow Events
To access the full set of the task data, click on the row containing the task.
HowTo: Manipulate Related Cases Inside Case Details
Open the case details
Scroll to Related Cases section. This section is shown only if the case has related cases.
By default, the following information is shown. To change it, click on Manage columns to select from:
Name
Description
Case ID
Creator
Creation date
Finished date
State
Category
The Action column provides these actions to handle the related case:
Case details
Business details
Side step
To see the details of the related case, click on its row. To export the related case list, click on Export to Excel.
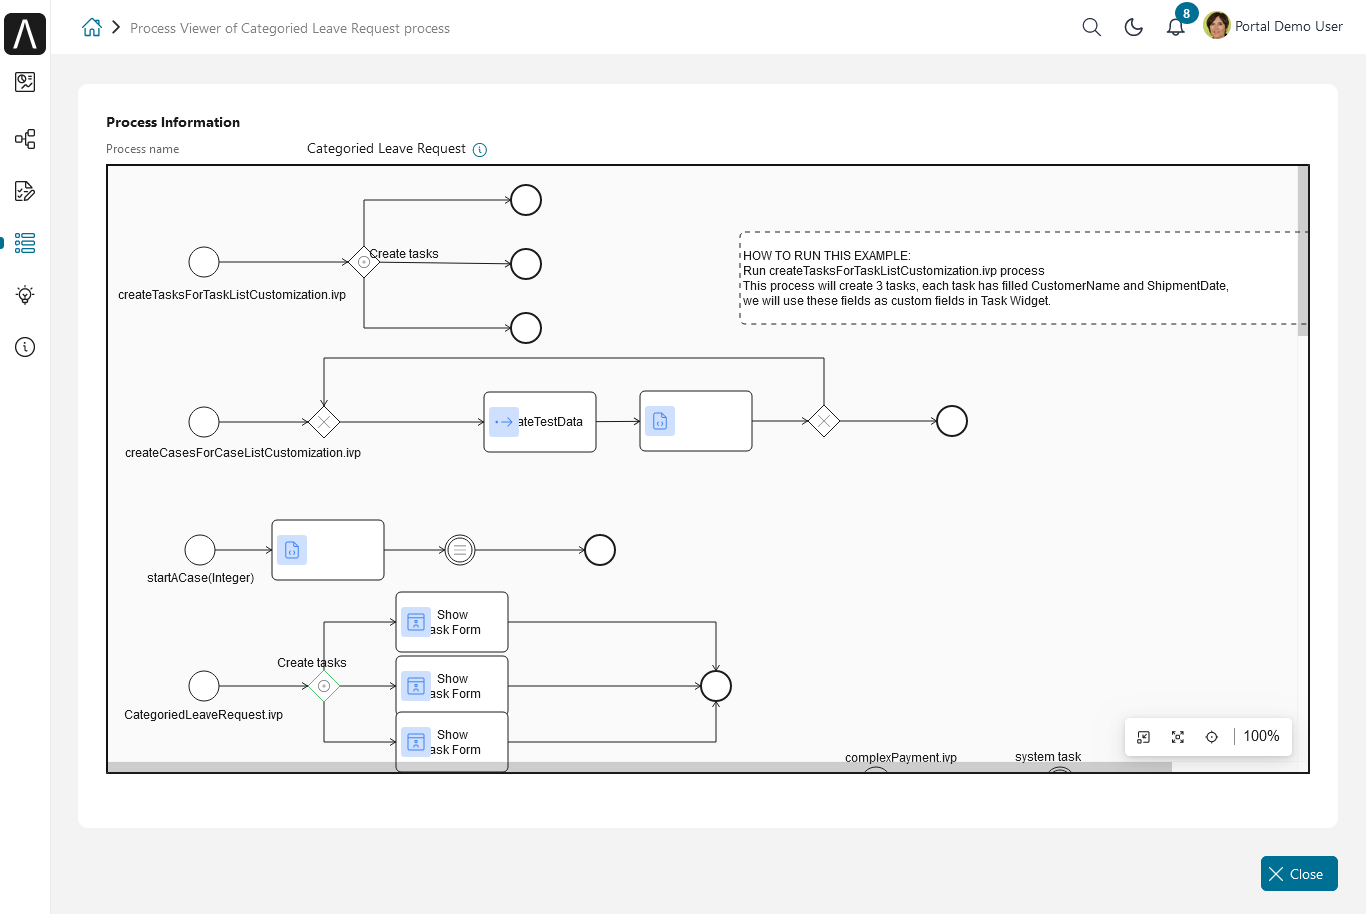
HowTo: Show Process Viewer
Case details
Task details
Full case list
Full task list
Click on Actions
Click on Process Viewer
Portal opens a new browser tab. You see the process viewer.
HowTo: Share Case Details
Open the case details
Click on the share button

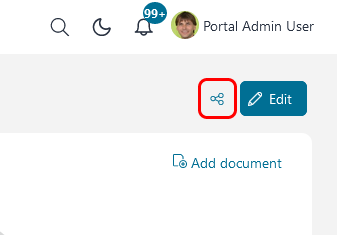
Note
Grant permission 🔑ShareCaseDetailsLink to allow a user to share case details.